
How to Adjust Rear Coilover Dampening for Better Ride Control
Learning how to adjust rear coilover dampening can make a large difference in how your car feels on normal roads, highways, back roads, or a track. The adjustment changes how strongly the shock absorber controls suspension movement. It does not simply make the spring harder or softer.
For most street cars in the US, the best setting is not the stiffest one. Roads often have expansion joints, potholes, patched pavement, and uneven surfaces. A rear suspension that is too firm can skip over bumps and lose grip instead of helping the car feel planted.
The safest way to tune rear dampening is to start from a known baseline. Make one small change, drive the same route, and note what you feel. In practical suspension tuning, this method works much better than turning the adjuster several clicks at once and guessing which change helped.
This guide explains how to adjust rear coilover dampening, which direction normally makes the setting firmer or softer, how to recognize poor settings, and how to balance ride quality with handling.

What Rear Coilover Dampening Adjustment Actually Does
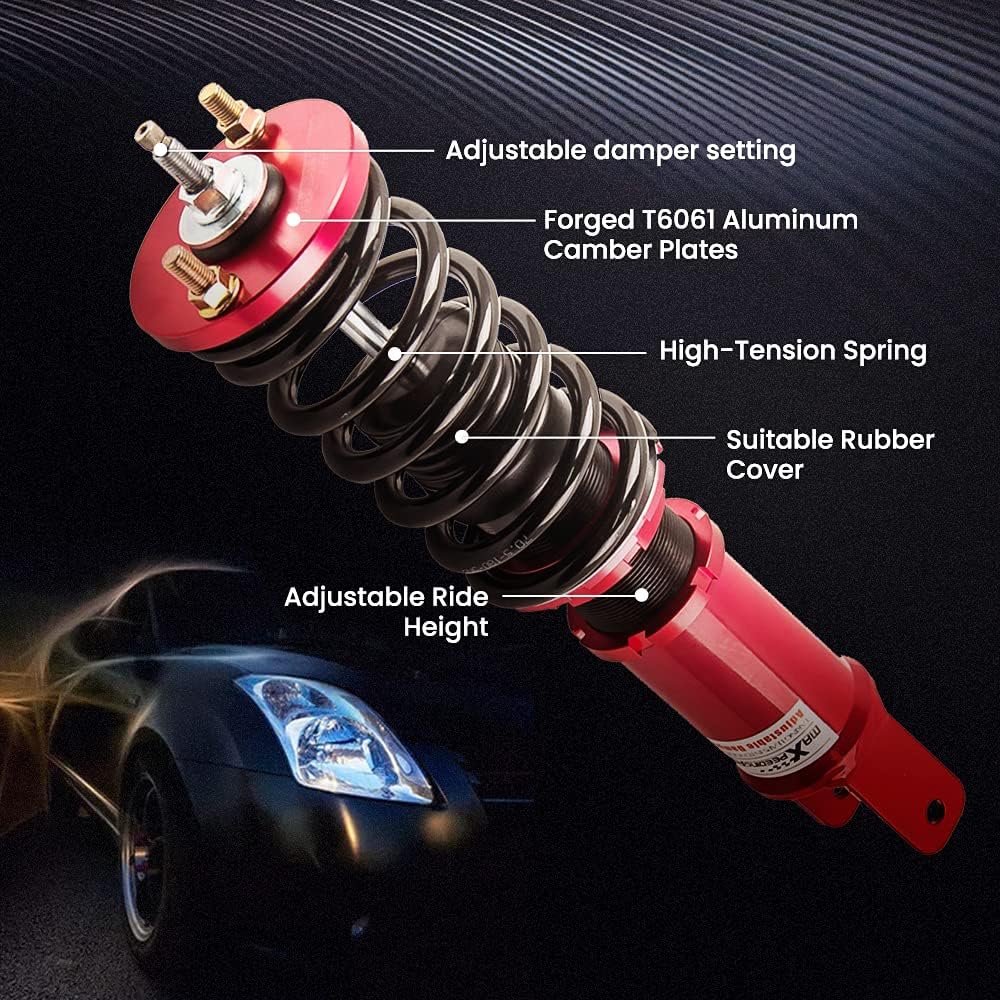
Before learning how to adjust rear coilover dampening, it helps to know what the adjuster controls. A coilover uses a spring to support the vehicle and a damper to control how fast the suspension moves. The damper forces oil through small passages and valves as the suspension compresses and extends.
Turning the dampening knob changes the resistance inside the damper. A firmer setting usually slows suspension movement. A softer setting allows the suspension to move more freely over bumps and dips.
This adjustment should not be confused with ride height. Changing dampening does not normally raise or lower the car. It also does not change the spring rate, although the car may feel softer or firmer because suspension movement changes.

- ✦ Spring
Supports the car’s weight and determines much of the basic suspension stiffness.
- ✦ Damper
Controls how fast the spring and suspension can move.
- ✦ Dampening Adjuster
Changes internal damping force, usually through a knob or adjustment screw.
- ✦ Ride Height Adjustment
Changes how high or low the vehicle sits and is separate from dampening on most coilovers.
Compression vs Rebound Dampening
Some coilovers have one adjustment that changes overall damping. More advanced systems may have separate compression and rebound controls. Compression controls how the damper reacts when the wheel moves upward, while rebound controls how it returns after being compressed.
- ✦ Compression
Controls resistance as the suspension compresses over a bump or under load.
- ✦ Rebound
Controls how quickly the suspension extends after compression.
Why More Dampening Is Not Always Better
A very firm damper may make the car feel sharp on smooth pavement, but it can reduce traction when the road becomes rough. The tire needs to follow the road surface. If the suspension cannot move enough, the tire may skip or unload.
- ✦ Street Driving
Usually benefits from enough compliance to absorb rough pavement without excessive bouncing.
- ✦ Performance Driving
May benefit from firmer control, but only while the tires stay in contact with the road.
How to Adjust Rear Coilover Dampening Step by Step
The correct process for how to adjust rear coilover dampening is simple, but patience matters. First, check the instructions for your exact coilover model. Some adjusters work in opposite directions, and some have different numbers of clicks.
Park the car on a flat surface and make sure the suspension components are cool enough to touch safely. Locate the rear damping adjuster. It may sit on top of the rear shock, at the bottom of the damper body, or on a remote reservoir.
Turn the adjuster gently toward its full soft or full hard position to establish a reference point. Do not force it when it stops. Count the available clicks or turns if the manufacturer does not already state the range.
Set both rear dampers to the same baseline. For a first setup, the middle of the adjustment range is often a practical starting point when the manufacturer does not provide another recommendation. Then drive the car and adjust from there.

- ✦ Step 1
Read the coilover manual and confirm the direction for soft and firm settings.
- ✦ Step 2
Locate the dampening adjuster on both rear coilovers.
- ✦ Step 3
Find a known reference position without forcing the adjustment mechanism.
- ✦ Step 4
Set the left and right rear coilovers to the same number of clicks.
- ✦ Step 5
Drive a familiar test route with bumps, turns, and smooth pavement.
- ✦ Step 6
Change only one or two clicks at a time.
- ✦ Step 7
Repeat the same route and compare the car’s response.
Where Is the Rear Dampening Adjuster Located?
Rear coilover adjusters are not always easy to see. On some cars, the knob sits at the top of the rear shock and can be reached from the trunk or cargo area. Other designs place the adjuster under the car or near the lower shock mount.
- ✦ Top-Mount Adjuster
Often reached from inside the trunk, hatch, or rear interior trim.
- ✦ Lower Adjuster
Located near the lower damper mount and may require access from underneath the vehicle.
- ✦ Remote Reservoir
Performance dampers may place an adjuster on a separate reservoir.
Keep Both Rear Sides Equal
For normal street tuning, keep the left and right rear dampers at matching settings. Unequal damping can make the car react differently during left and right turns. Only use different side-to-side settings when a specific motorsport setup calls for it.
- ✦ Record Your Settings
Write down the number of clicks from full soft or full firm so you can return to your baseline.
Which Way Do You Turn Rear Coilovers for Softer or Firmer Dampening?
On many adjustable coilovers, turning the knob clockwise increases damping and turning it counterclockwise reduces damping. You may also see markings such as H and S, plus and minus, or Firm and Soft. However, you should always confirm the directions for your exact coilover model.
Do not assume every brand works the same way. If you are learning how to adjust rear coilover dampening on a newly installed kit, check the manual before making changes. Turning an adjuster beyond its normal stop can damage the mechanism.

- ✦ Clockwise
Often increases damping and makes suspension movement more controlled.
- ✦ Counterclockwise
Often reduces damping and allows easier suspension movement.
- ✦ H or Plus
Usually means harder or firmer damping.
- ✦ S or Minus
Usually means softer damping.
What Does One Click Mean?
A click is one small indexed position in the adjuster. Each click changes damping by a small amount. The effect of one click varies by damper design, so there is no universal percentage that applies to all coilovers.
- ✦ Small Changes Work Best
One or two clicks at a time make it easier to feel whether the adjustment helped.
How to Find the Best Rear Dampening Setting for Street Driving
There is no single best setting for every car. Vehicle weight, spring rate, tire type, ride height, road quality, and driver preference all matter. The goal is to find a setting that keeps the rear tires planted without allowing uncontrolled bouncing or body movement.
For daily driving, start near the manufacturer recommendation. If none is given, a middle setting can provide a useful baseline. Drive over normal roads rather than judging the suspension while the car is parked.
If the rear feels harsh over small bumps, reduce damping by one or two clicks. If the rear keeps moving after a bump or feels loose during quick direction changes, add a small amount of damping.

- ✦ Too Harsh
Soften the rear damping slightly and test again.
- ✦ Too Bouncy
Add damping in small steps if the rear continues to oscillate after bumps.
- ✦ Good Setting
The car settles quickly while the tires remain in contact with rough pavement.
- ✦ Test Consistently
Use the same tire pressure, route, load, and driving speed when comparing settings.
How Rough Roads Affect Your Setting
Rough roads often need a softer setting than smooth pavement. Too much damping can prevent the rear suspension from moving quickly enough to follow a series of bumps. The result may feel harsh and can reduce traction.
- ✦ Rough Pavement
Try slightly softer damping so the wheel can follow the road.
- ✦ Smooth Pavement
A firmer setting may feel more controlled because less suspension travel is needed.
How Passengers and Cargo Affect Rear Dampening
Extra passengers or cargo increase load on the rear suspension. In some cases, a small increase in damping can improve control. Do not make large changes unless the vehicle clearly feels underdamped.
- ✦ Heavy Loads
Retest the suspension when the car regularly carries extra rear weight.
Signs Your Rear Coilover Dampening Is Too Stiff
A rear suspension that is too stiff does not always feel better. One common sign is a sharp impact through the seat when the rear tires cross small bumps, bridge joints, or broken pavement. The car may feel busy even on roads that should feel fairly smooth.
Another clue is reduced grip on uneven corners. If the rear tires hop, skip, or feel nervous over mid-corner bumps, the dampers may be restricting wheel movement too much. Softening them one or two clicks can help the tires follow the surface.
When deciding how to adjust rear coilover dampening, focus on tire contact and vehicle control rather than stiffness alone. A suspension should control movement without preventing useful travel.

- ✦ Sharp Ride
Small road impacts feel unusually strong inside the cabin.
- ✦ Rear Tire Skipping
The rear feels as if it jumps sideways over rough pavement.
- ✦ Poor Rough-Road Grip
Traction drops when the surface becomes uneven.
- ✦ Very Little Suspension Compliance
The car feels rigid rather than controlled.
Do Not Confuse Firm Dampening With Bottoming Out
A hard impact does not always mean the damping is too firm. The suspension may be reaching its bump stop because the car sits too low or has too little travel. Check ride height and available suspension travel before changing the damper repeatedly.
- ✦ Check Suspension Travel
Make sure the suspension has enough room to compress before it reaches the bump stop.
Signs Your Rear Coilover Dampening Is Too Soft
Rear damping that is too soft can allow the body to keep moving after the road disturbance has passed. After crossing a dip or large bump, the rear may rise and fall more than once before it settles. That is a common sign that the damper needs more control.
The rear may also feel slow or vague during fast steering changes. During acceleration, braking, or cornering, excess suspension movement can make the car feel less precise. Increasing the damping one or two clicks may improve control.
Do not keep adding damping until the car becomes harsh. The goal when learning how to adjust rear coilover dampening is to use only enough damping to control the spring and vehicle body.
- ✦ Repeated Bouncing
The rear moves more than once after a bump or dip.
- ✦ Floaty Feeling
The rear takes too long to settle after road changes.
- ✦ Excess Body Movement
The car feels loose during fast steering inputs.
- ✦ Slow Response
The rear suspension seems delayed during transitions.
Can Soft Dampening Improve Grip?
Yes, within reason. Softer damping can help the tire stay in contact with rough pavement because the wheel can move more freely. The setting becomes too soft when suspension movement is no longer controlled.
- ✦ Balance Matters
Use enough compliance for grip and enough damping to stop excess motion.
How Rear Dampening Changes Oversteer, Understeer, and Balance
Rear damper changes can affect how quickly weight moves across the car during steering, braking, and acceleration. This can change the way the vehicle feels during corner entry, transitions, and rough turns. However, damping is only one part of overall handling balance.
Increasing rear damping may make the rear respond faster during transitions. If taken too far, it can reduce rear grip on rough surfaces and make the car feel nervous. Softer rear damping can make the rear more compliant, but an extremely soft setting may allow too much movement.
Do not treat the dampening knob as a direct oversteer or understeer switch. Tire pressures, alignment, sway bars, spring rates, differential behavior, road surface, and driving inputs can have equal or greater effects.
- ✦ Firmer Rear
Can make the rear react more quickly but may reduce compliance when set too firm.
- ✦ Softer Rear
Can improve compliance and rough-road grip but may feel slow if set too soft.
- ✦ Balanced Setup
Keeps the rear predictable while maintaining useful suspension movement.
Change One Variable at a Time
Do not change rear damping, tire pressure, alignment, and ride height at the same time. If the car improves or becomes worse, you will not know which change caused it. Professional suspension tuning is much easier when each change is isolated.
- ✦ Keep Notes
Record each adjustment and how the car reacted on the same test route.
How to Tune Rear Coilovers for Comfort
If comfort is your main goal, do not assume the softest possible setting is always best. Extremely soft damping can let the car bounce and move too much. A comfortable setup still needs enough damping to settle the suspension after bumps.
Start from the recommended baseline and reduce damping in small steps. Test over the roads you drive every day, including expansion joints and patched pavement. Stop softening once harshness improves without adding unwanted bouncing.
For a daily driver, good rear dampening should make bumps feel controlled rather than sharp. The body should settle quickly after a dip, and the tires should stay connected to the road.
- ✦ Start Near the Middle
Use a moderate baseline instead of going straight to full soft.
- ✦ Reduce One or Two Clicks
Small changes make comfort improvements easier to judge.
- ✦ Watch for Bouncing
If the rear starts floating or oscillating, add a little damping back.
Tire Pressure Can Affect Ride Quality Too
Tires are part of the suspension system. Excessive tire pressure can make the car feel harsh even when the coilovers are set correctly. Use the vehicle and tire manufacturer’s recommended pressure range before blaming the dampers.
- ✦ Check Pressure Cold
Compare suspension settings with consistent tire pressures for more reliable results.
How to Adjust Rear Coilover Dampening for Performance Driving
For performance driving, the goal is not maximum stiffness. The goal is controlled weight transfer and consistent tire contact. A damper that is too firm may feel responsive during the first steering input but lose grip when the track or road gets bumpy.
Begin with the manufacturer’s performance baseline if one is available. Increase rear damping gradually while watching how the car behaves through braking zones, transitions, corner exits, and uneven sections.
Make only one adjustment between test sessions. Two clicks can sometimes be enough to change how a sensitive chassis feels. Large changes make it harder to understand the effect.
When learning how to adjust rear coilover dampening for track use, tire temperatures, tire wear, alignment, and driver feedback can provide useful clues. However, always prioritize predictable handling over chasing the firmest possible setup.
- ✦ Smooth Track
May tolerate firmer damping because the suspension encounters fewer sharp bumps.
- ✦ Bumpy Track
Often needs more compliance so the tires can maintain contact.
- ✦ Fast Transitions
A small increase in damping can help control rapid body movement.
- ✦ Loss of Rear Grip
If the rear skips across bumps, try reducing damping before assuming you need more stiffness.
Return to Street Settings After Track Use
A setting that works well on smooth track pavement may feel harsh during the drive home. Record both your street and track settings. This makes it easy to switch between them without starting the tuning process again.
- ✦ Keep a Setup Log
Record rear clicks, front clicks, tire pressure, and driving conditions for each setup.
Common Mistakes When Adjusting Rear Coilover Dampening
One of the biggest mistakes is making large changes. Turning the adjuster ten clicks at once may change the car so much that you cannot tell what setting actually works. Small adjustments provide much clearer feedback.
Another common mistake is using damping to fix a mechanical problem. Worn bushings, loose mounts, damaged dampers, poor alignment, incorrect ride height, or rubbing tires will not be solved by turning the adjustment knob.
Drivers also sometimes confuse dampening with spring preload. These settings affect different parts of the suspension system. Learn what each adjuster does before changing it.
- ✦ Changing Too Many Clicks
Large changes make it difficult to identify the best setting.
- ✦ Forcing the Adjuster
Stop turning when you reach the normal end of the adjustment range.
- ✦ Using Unequal Rear Settings
Keep both rear sides matched for normal street use.
- ✦ Ignoring Mechanical Problems
Inspect suspension parts before trying to tune around noises, leaks, or looseness.
- ✦ Changing Height and Damping Together
Change one variable at a time so you know what caused the result.
Do Not Adjust a Damaged Coilover
If a coilover leaks oil, has a bent shaft, makes unusual knocking sounds, or has a damaged adjuster, inspect or service it before tuning. An adjustment cannot restore normal damping if the unit itself has failed.
- ✦ Inspect First
Check for leaks, loose hardware, damaged mounts, and worn bushings before tuning.
Rear Coilover Dampening vs Spring Preload and Ride Height
Dampening, spring preload, and ride height are related to suspension setup, but they are not the same adjustment. Understanding the difference can prevent many common tuning mistakes.
Dampening controls the speed of suspension movement. Spring preload changes how much the spring is compressed at a certain suspension position. Ride height changes how high or low the vehicle sits.
When figuring out how to adjust rear coilover dampening, leave the other settings unchanged at first. This lets you judge the effect of the damper adjustment by itself.
- ✦ Dampening
Controls the speed and resistance of suspension movement.
- ✦ Spring Preload
Changes initial spring compression according to the design of the coilover.
- ✦ Ride Height
Changes vehicle height and available suspension geometry or travel.
Why Ride Height Matters Before Dampening Tuning
A car that is extremely low may have limited suspension travel. That can create harsh impacts that no dampening setting can fully correct. Set a safe ride height with adequate travel before spending time on detailed damper tuning.
- ✦ Maintain Travel
The suspension needs room to compress and extend if the damper is going to work correctly.
A Simple Rear Coilover Tuning Method You Can Repeat
A repeatable tuning process is the easiest way to find a good setting. Start with a known baseline and write it down. Then use the same route, speed, tire pressure, and vehicle load for each test.
Pay attention to one problem at a time. For example, focus first on harshness over small bumps. Once that feels right, evaluate how quickly the rear settles after larger dips and how stable it feels during turns.
This method is especially useful for anyone learning how to adjust rear coilover dampening for the first time. It replaces guesswork with simple comparisons.
- ✦ Baseline
Record the current number of clicks on both rear dampers.
- ✦ Test
Drive the same short route and note specific behavior.
- ✦ Adjust
Change both rear dampers by one or two clicks.
- ✦ Retest
Repeat the route under similar conditions.
- ✦ Compare
Keep the new setting only if it clearly improves the car.
- ✦ Record
Write down the final setting for future reference.
What to Write in Your Setup Notes
Simple notes are enough. Record the number of rear clicks, road type, tire pressure, vehicle load, and what you liked or disliked. Over time, this gives you a useful setup guide for different driving conditions.
- ✦ Example Note
Rear: 12 clicks from soft. Ride smooth on highway, controlled over dips, slightly harsh on broken pavement.


