To remove track bar bushings, safely support the vehicle, remove the track bar if required, identify the bushing design, and press or carefully extract the old bushing with the correct tool. Avoid hammering the suspension mount or cutting into the metal housing.
On American vehicles such as the Ford F-250, Jeep Wrangler, Jeep Grand Cherokee, and Ram 2500, the track bar helps keep a solid axle centered beneath the vehicle. Its bushings cushion movement at the mounting points and help limit unwanted axle shift. When a bushing wears, cracks, separates, or develops excess play, the suspension may produce clunks or feel less stable.
The correct way to remove track bar bushings depends on the vehicle, the track bar design, and whether the bushing has a separate metal shell. Some bushings can be pressed out with a suitable service tool. Others require removal of a retaining sleeve, a dedicated adapter, or replacement of the complete track bar. Check the factory service information for your exact model before starting.
This guide explains the tools, removal steps, safety checks, common problems, and replacement decisions involved in track bar bushing service. It focuses on methods that protect the track bar and mounting hardware rather than forcing a seized bushing out with uncontrolled blows or heat.
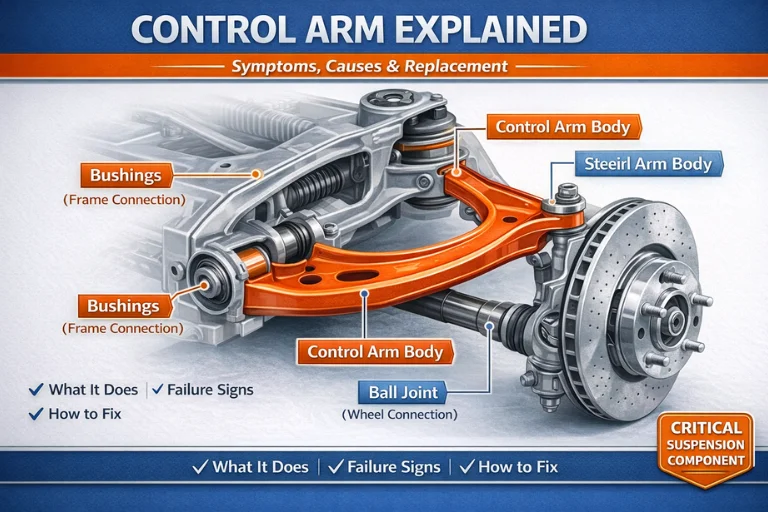
A track bar, also called a Panhard bar, is a suspension link used on many vehicles with a solid axle. It connects the axle to the chassis or frame and limits side-to-side movement as the suspension travels. The bar works with the rest of the suspension to keep the axle in its intended lateral position.
A track bar bushing sits at one of the bar’s mounting ends on designs that use bushings. It may contain rubber, polyurethane, or a bonded rubber-and-metal construction. The bushing allows controlled movement while reducing vibration and impact noise transmitted into the vehicle.
Bushing construction matters during removal. Some designs use an outer metal shell pressed into the track bar eye. Others use a rubber insert, a separate inner sleeve, or a serviceable joint that follows a different procedure. Do not assume every track bar bushing can be pushed out in the same direction.
Source: 1aauto.com
Rubber bushings
These provide flexibility and vibration isolation. A bonded design may need to be pressed out as a complete unit, depending on the manufacturer’s instructions.
Polyurethane bushings
Some are supplied as separate inserts and sleeves. Their removal and lubrication requirements differ from those of bonded rubber bushings.
Track bars with serviceable joints
A spherical joint or ball-joint-style end is not the same as a conventional rubber bushing. Follow the correct service procedure rather than applying a generic press method.
Signs That a Track Bar Bushing May Be Worn
Common clues include a clunk over bumps, visible cracking, rubber separation, or movement at the track bar mounting end. Some drivers also notice vague steering or a change in how the vehicle responds to road inputs. These symptoms do not prove that a bushing is the cause.
A loose mounting bolt, worn track bar joint, damaged bracket, steering linkage problem, or other suspension fault can produce similar signs. Inspect the entire assembly before ordering parts. If the axle shifts visibly, the steering feels unsafe, or the mounting bracket is cracked, stop driving and arrange a proper inspection.
Look for physical damage
Check for torn rubber, a displaced sleeve, a loose fit, corrosion, or a bushing that has moved out of its housing.
Check for excess movement
With the vehicle safely positioned and following the service procedure, inspect the mounting ends for movement beyond the design’s normal compliance.
Tools and Supplies Needed for Track Bar Bushing Removal
Gather the correct tools before loosening the track bar. The best setup depends on whether the bushing can be serviced on the vehicle or whether the entire bar must be removed. A bench vise or hydraulic press may be useful after removal, but only when the tool and adapters are suitable for the load and component shape.
Use the vehicle service manual to identify fastener sizes, approved support points, removal direction, and torque specifications. Do not rely on a generic torque value from another truck or Jeep. Track bar mounting bolts can vary by model, year, suspension configuration, and replacement component.
Source: YouTube, Make It Mike
Vehicle support equipment
Use a floor jack with adequate capacity, correctly rated jack stands, wheel chocks, and a level, firm work surface. Follow the specified lifting and support points.
Hand tools
Prepare the correct sockets, wrenches, breaker bar, and a torque wrench that covers the required specification. Use a suitable penetrating oil if corrosion is present.
Bushing removal equipment
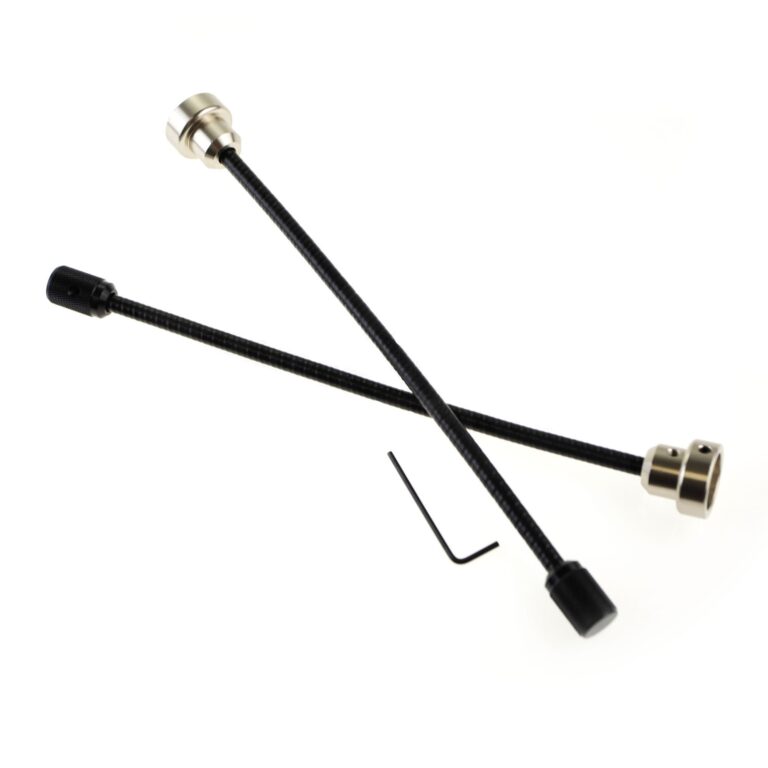
Depending on the design, use a compatible bushing press kit, threaded service tool, hydraulic press with suitable adapters, or an approved removal fixture.
Personal protection
Wear safety glasses and suitable gloves. Keep hands clear of pinch points and never place fingers between a loaded press adapter and the component.
Replacement parts
Have the correct replacement bushing, sleeves, washers, and any specified new fasteners ready. Verify the part number and dimensions before removing the old component.
Why the Correct Press Adapter Matters
A press adapter must contact the part intended to move without crushing the bushing or damaging the track bar eye. The receiving cup needs enough internal clearance for the bushing or shell to exit. The pushing tool must fit the permitted contact area.
If an adapter contacts the surrounding bar, bends a flange, or pushes on an unsupported edge, the load can deform the mounting eye. A damaged eye may no longer hold the replacement bushing securely. Stop if the adapters do not fit squarely or the component starts to distort.
Check alignment
Center the pushing tool and receiving cup along the bushing’s intended removal path.
Check tool capacity
Use equipment rated for the force required. Do not extend press handles or improvise with unstable stacks of sockets.
How to Remove Track Bar Bushings Step by Step
The safest general approach is to confirm the design, secure the vehicle, remove the track bar when the procedure calls for it, and extract the bushing with controlled force. The exact steps can differ between a Ford Super Duty, Jeep, Ram truck, and aftermarket suspension system, so use the instructions for the specific application whenever they differ from this overview.
Source: YouTube, TRQ
Step 1: Identify the vehicle and bushing
Record the model year, make, model, drivetrain, axle, and any suspension modifications. Determine whether the bushing has a pressed-in outer shell, a separate sleeve, or a different type of joint.
Step 2: Park and secure the vehicle
Park on a firm, level surface, select Park or the appropriate gear, apply the parking brake when suitable, and chock the wheels that remain on the ground. Follow the manual’s instructions for the suspension position and lifting points.
Step 3: Raise and support the vehicle if needed
Use an appropriately rated jack and support stands at the specified locations. If the work requires suspension unloading or axle support, use a suitable secondary support so the axle cannot move unexpectedly when the bar is disconnected.
Step 4: Inspect and document the installation
Photograph the track bar orientation and note the location of washers, spacers, sleeves, and brackets. Look for damaged threads, corrosion, cracks, and evidence that the bushing has shifted.
Step 5: Support the axle or bar as directed
Prevent the axle and track bar from dropping or swinging when a mounting bolt is removed. The bar can be under lateral load even when the vehicle appears stationary.
Step 6: Remove the mounting fasteners
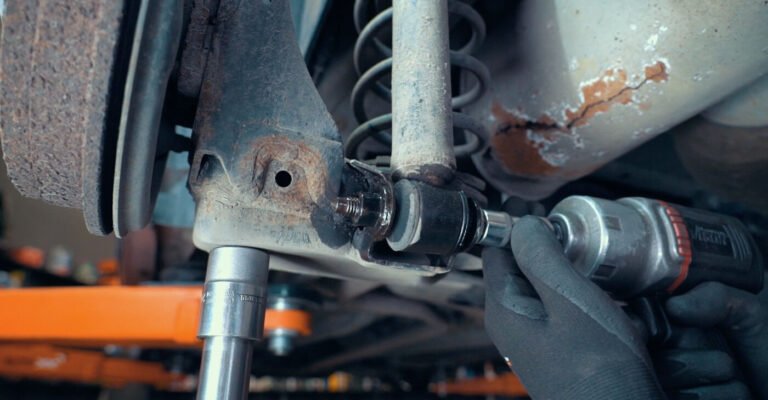
Use the correct tools to loosen the specified fasteners. If the bolt binds because the axle is pushing against the bar, adjust the support position in small, controlled steps according to the service procedure. Do not force the bolt through a loaded joint.
Step 7: Remove the track bar if required
Some designs allow a bushing to be serviced in place, but many require the bar to be removed. Keep track of its original orientation and protect nearby brake hoses, wiring, steering parts, and painted surfaces.
Step 8: Clean and inspect the bushing housing
Remove loose dirt and corrosion around the bushing eye. Identify the shell and the direction in which the bushing is designed to come out. Check for retaining features or manufacturer-specific restrictions before applying pressure.
Step 9: Position the removal tool
Set the receiving cup over the exit side and align the driver with the permitted pushing surface. Confirm that the tool will not contact or deform the track bar eye.
Step 10: Press out the old bushing
Apply steady, controlled force using the correct service tool. Watch the bushing, adapters, and bar closely. If the assembly tilts, bends, shifts, or requires abnormal force, release the load and reassess the setup.
Step 11: Remove remaining material and clean the bore
If the old bushing separates, remove loose rubber or sleeves only as permitted by the component design. Clean the bore without removing sound base metal or changing its shape.
Step 12: Inspect the track bar before installation
Check the eye for cracks, distortion, heavy pitting, or a damaged press fit. If the housing is deformed or the bar is cracked, replace the affected component rather than trying to make the new bushing fit.
Removing a Bushing While the Track Bar Is Still Installed
In-place removal is appropriate only when the vehicle or component maker permits it and there is enough room to position a proper service tool. The bar must be supported, and the axle must be held in the required position. Limited clearance can make correct alignment difficult.
Do not assume that a portable press tool will fit every mounting end. If the tool cannot sit squarely, the receiving cup cannot capture the bushing, or the bar is carrying side load, remove the track bar as instructed instead. Extra force is not a substitute for proper access.
Use in-place service only when approved
Confirm that the tool fits the bushing and mounting arrangement without loading nearby parts.
Stop if the axle shifts
Release the load and secure the suspension before continuing. Never reach into a pinch point to realign a loaded tool.
Removing a Press-Fit Metal-Shell Bushing
A metal-shell bushing is often removed by pushing the assembly out through the housing with a matched driver and receiving cup. The shell’s fit can be tight, especially when corrosion has formed between the shell and the track bar eye.
The direction of removal and the exact contact surface depend on the design. If the service instructions call for a dedicated tool, follow that procedure. Do not assume that the inner sleeve is a suitable point to press on when the tool is intended to load the outer shell.
Keep the driver centered
Misalignment can jam the shell or damage the bore as the press load rises.
Do not enlarge the housing
Grinding, aggressive drilling, or cutting into the bar can compromise the press fit and the strength of the component.
How to Remove a Stuck or Seized Track Bar Bushing
A seized bushing often resists removal because of corrosion, a distorted shell, incorrect tool alignment, or a design that requires a different method. Start by releasing the load and checking the setup instead of immediately increasing force. A bushing that does not move under controlled pressure may be telling you that the tool or procedure is wrong.
Apply penetrating oil only where it can reach the corroded interface and where the product is compatible with nearby rubber, coatings, and components. Allow time for it to work, then clean excess fluid before pressing. Penetrating oil may help with corrosion but will not correct a deformed housing or an incompatible removal tool.
Source: storage.googleapis.com
Recheck the removal direction
Look for shoulders, flanges, retaining features, or design details that prevent the bushing from moving in the direction you selected.
Inspect the adapter position
Release the press and verify that the driver and receiving cup remain centered and stable.
Look for corrosion or deformation
Heavy rust or a damaged eye can prevent normal movement. Do not force the shell through a housing that is visibly bent or cracked.
Use a model-specific tool when needed
If a universal kit cannot support the bar correctly, obtain the specified service tool or have a suspension shop remove the bushing.
Should You Cut or Burn Out the Old Bushing?
Cutting or burning a bushing is not a safe default method. A saw or rotary tool can cut into the track bar eye, and heat can damage coatings, weaken or distort components, ignite fluids, or release hazardous fumes from rubber and polyurethane. Nearby hoses, wiring, seals, and underbody materials may also be exposed.
Use a destructive removal method only when the manufacturer explicitly permits it and the work can be controlled with the correct equipment and protective measures. If a shell must be cut, the operator must know how to relieve its tension without cutting the housing. For a valuable or safety-critical component, professional removal is often the better option.
Avoid uncontrolled torch heat
Do not heat the track bar eye or surrounding suspension parts to loosen a bushing unless an approved procedure specifically allows it.
Do not hammer the mounting eye
Heavy blows can deform the eye, damage the bracket, or cause the tool to slip.
Track Bar Bushing Removal Methods Compared
The best removal method is the one that matches the bushing design and applies force to the correct surfaces. A press is not automatically suitable for every track bar, and a universal kit is useful only when its adapters fit the component securely.
Source: YouTube, TRQ
Inspecting the Track Bar Before Installing a New Bushing
After the old bushing is removed, inspect the track bar and mounting area before fitting replacement parts. The new bushing must sit in a housing that remains within its intended shape and dimensions. A loose or damaged bore can prevent the replacement from staying secure even when the installation appears complete.
Check the bar for cracks, bends, severe rust, or impact damage. Examine the mounting brackets for cracks, elongated bolt holes, and distorted edges. Inspect the fasteners and threads for wear, corrosion, or damage, and replace parts when required by the service information.
Source: 1aauto.com
Check the bushing bore
The bore should be clean and free of damage that would interfere with the specified fit. Do not grind away material to make a replacement bushing fit.
Check the mounting bolts
Look for damaged threads, necking, corrosion, or other signs that a bolt should be replaced. Follow any one-time-use fastener instructions.
Check the bracket and frame
A cracked or distorted bracket needs proper repair or replacement before the vehicle returns to service.
Compare the new and old parts
Check the outer diameter, width, sleeve arrangement, and part number. An apparent size match does not prove that the bushing is correct for the application.
When Replacing the Complete Track Bar Makes More Sense
Replacing the complete track bar may be more appropriate when the bar is bent, its bushing eye is damaged, the joint is not separately serviceable, or the manufacturer specifies assembly replacement. Some aftermarket bars also use proprietary bushings or joints that require particular parts and procedures.
Compare the cost and availability of a correct replacement bushing with the condition of the bar and the labor needed for removal. Do not fit a new bushing into a damaged eye merely to avoid replacing the bar. A secure, correct fit is more important than salvaging a component that no longer meets its design requirements.
Replace damaged structural parts
Do not reuse a cracked or distorted track bar or mounting bracket.
Confirm serviceability
Use the vehicle or component maker’s parts information to determine whether the bushing can be replaced separately.
Installing Replacement Track Bar Bushings Correctly
Installing the new bushing is not simply the reverse of removal. Some bushings have an orientation mark, offset sleeve, or specific pressing direction. Follow the instructions supplied with the replacement part and the factory service procedure for the vehicle.
Clean the bore and use only the lubricant or assembly aid approved for that bushing material. Some rubber compounds can be damaged by petroleum-based products, while certain polyurethane designs require a specified lubricant to reduce squeaks and wear. Do not lubricate a press-fit surface unless the instructions allow it.
Align the replacement carefully and press it into place using the recommended adapters. Keep the bushing square to the housing and watch for pinching, tearing, or shell distortion. Stop if it begins to enter at an angle or requires force beyond what the tool and procedure reasonably call for.
Source: YouTube, Make It Mike
Verify orientation
Match the marks, offset, sleeve position, and alignment features specified by the manufacturer.
Avoid damaging the new bushing
Do not strike the rubber or force the sleeve into place with uncontrolled blows. Use the approved driver and support arrangement.
Reinstall the track bar correctly
Position the bar and axle as directed, install the correct hardware, and tighten the fasteners to the exact vehicle or component specification.
Follow ride-height torque requirements
If the service procedure requires final tightening at normal ride height, do not perform the final torque step with the suspension hanging.
Why Correct Torque and Suspension Position Matter
Track bar fasteners must clamp the mounting joint securely without exceeding the specified load. Too little torque can allow movement, while excessive torque can damage hardware or threads. The correct value and any required tightening sequence must come from the service information for the exact vehicle or replacement component.
Some bonded rubber bushings are designed to operate with the inner sleeve clamped in a defined position. Tightening such a bushing at the wrong suspension position can preload the rubber and affect its service life. This requirement is design-specific, so follow the manufacturer’s instructions rather than applying it to every bushing.
Use a torque wrench
Apply the specified value and tightening sequence rather than relying on feel.
Check any alignment requirements
Suspension changes or an adjustable track bar may require axle-centering checks or a professional alignment assessment.
Common Mistakes to Avoid
Most avoidable damage comes from using the wrong removal direction, applying force through an unsuitable surface, or failing to support the suspension. A slow inspection before pressing can prevent damage that would turn a routine bushing service into a track bar replacement.
Source: YouTube, TRQ
Using a jack as the only support
A hydraulic jack can shift or lose pressure. Support the vehicle with correctly rated stands and secure the axle when required.
Pressing without a receiving cup
The bushing needs space to exit. Pressing against a closed or poorly supported surface can bend the tool or damage the housing.
Using the wrong bushing size
A close-looking part may have a different shell diameter, sleeve width, or rubber compound. Verify fitment using the correct application data.
Heating the track bar to save time
Uncontrolled heat can damage nearby parts and alter the condition of the bar. Use only an approved procedure.
Ignoring damaged mounting hardware
A new bushing cannot correct loose fasteners, an elongated mounting hole, or a cracked bracket.
Skipping the final inspection
Verify that the bar is correctly seated, all required hardware is installed, fasteners are torqued, and no tools or supports remain in an unsafe position.
When to Stop and Seek Professional Help
Stop the job if the vehicle cannot be supported securely, the axle moves unexpectedly, the bushing will not move with the correct tool, or the track bar eye starts to deform. A cracked bracket, damaged frame mount, badly seized fastener, or uncertain removal procedure also calls for qualified help.
If the track bar is part of a modified suspension, confirm the instructions for the exact lift kit or aftermarket component. Changes to track bar length, bracket location, and suspension geometry can affect axle centering and handling. Have the completed installation checked by a qualified technician if correct positioning or torque cannot be verified.
Stop for structural damage
Do not return the vehicle to service with a cracked bar, damaged bracket, or uncertain mounting integrity.
Stop for unsafe handling
If steering control is poor, the axle shifts, or suspension movement seems abnormal, avoid driving until the fault is diagnosed.
How to Confirm the Repair Is Complete
A successful repair leaves the replacement bushing seated correctly, the track bar secured at its mounting points, and the surrounding parts free of damage. The suspension should move as designed without a loose connection or a bushing that shifts in its housing.
Before lowering the vehicle, confirm that all fasteners are installed and tightened according to the correct procedure. Check that brake hoses, electrical wiring, steering links, and other nearby parts are routed correctly and are not trapped or stretched. Remove tools from the work area and lower the vehicle using the proper lifting procedure.
After the vehicle is back at the specified ride height, perform the required final torque checks and visual inspection. If a road test is permitted and the assembly is verified safe, begin cautiously in a low-risk area. Listen for new noises and pay attention to steering response, but do not use a road test to compensate for uncertain installation quality.
Reinspect the assembly if the service instructions call for it or if any noise or handling change appears. If the original clunk, steering concern, or axle movement remains, investigate other causes instead of assuming the new bushing has failed.
Source: YouTube, TRQ
Correct seating
The bushing and sleeve sit in the intended position without visible distortion or damage.
Secure fasteners
All mounting hardware meets the specified torque and installation requirements.
No interference
Nearby hoses, wiring, and suspension parts have the required clearance through the permitted range of movement.
Safe handling
The vehicle shows no new clunks, visible joint movement, or abnormal steering response. Any concern requires further diagnosis.
Frequently Asked Questions
Q
Can I remove track bar bushings without removing the track bar?
Sometimes. In-place removal is possible when the design permits it, the correct service tool fits, and the axle and bar can be safely supported. If access is limited or the bushing is pressed into a difficult position, removing the complete track bar may provide better control.
Q
What is the easiest tool for removing track bar bushings?
A bushing press kit with adapters matched to the bushing and track bar eye is often the most controlled option. Some applications require a dedicated service tool or a suitable hydraulic press. The easiest tool is the one that fits the specific design and supports the housing correctly.
Q
Can I hammer out a track bar bushing?
Heavy hammering is not a good general method. It can deform the track bar eye, damage the mounting bracket, or cause the tool to slip. Follow the service procedure and use a correctly aligned press or approved removal tool when the bushing is designed for press removal.
Q
Should I replace both track bar bushings at the same time?
Inspect both ends and follow the vehicle or component manufacturer’s recommendations. Replacing both may make sense when both are worn or the complete bar is being serviced, but it is not a universal requirement. Confirm that each end uses a separately serviceable bushing before ordering parts.
Q
Can bad track bar bushings cause steering problems?
Worn bushings can allow unwanted axle movement and may contribute to clunks, vague steering, or unstable-feeling handling. These symptoms also occur with other suspension and steering faults. Inspect the full system before deciding that the track bar bushings are the cause.
Q
Do I need an alignment after replacing track bar bushings?
A bushing replacement does not automatically require every type of wheel alignment, but the correct answer depends on the vehicle and the work performed. If the track bar length, mounting position, suspension geometry, or related steering components changed, an axle-centering check or alignment assessment may be needed. Follow the manufacturer’s instructions.
Q
Can I drive with a worn track bar bushing?
A visibly damaged or loose track bar bushing can affect axle location and vehicle handling. If the bar moves excessively, a mounting bolt is loose, the bracket is cracked, or steering control is impaired, do not continue driving. Arrange an inspection and repair before returning the vehicle to service.
✦ Wrapping Up
Conclusion
Removing track bar bushings is manageable when the correct procedure, tools, and safety measures match the vehicle. Start by identifying the bushing design and checking the service information. Secure the vehicle and axle, remove the bar when required, and use a correctly aligned tool to extract the bushing without damaging the housing.
Before fitting a replacement, inspect the track bar eye, mounting bracket, and fasteners. Install the correct part in the specified orientation, follow the required torque procedure, and verify that the suspension and steering components have proper clearance. If the bushing is seized, the housing is damaged, or the correct method is unclear, stop and seek qualified help.
💡 Key Takeaway
Identify your exact vehicle and track bar part number first. Then confirm the bushing type, removal direction, required service tool, and factory torque specifications before starting the job.
Eric
Hi, I’m Eric Bennett, the person behind OffRoadTruckAccessories.com.
I created this blog to share my interest in trucks, off-road driving, automotive accessories, and DIY modifications. I enjoy learning how different truck accessories work, testing their usefulness, and understanding whether they are truly worth buying.