To remove a Ford F-250 track bar ball joint, safely support the front axle, disconnect the track bar, remove the retaining nut, and separate the tapered joint with a suitable steering linkage puller. If the ball joint is pressed into the track bar or its mounting assembly, use the correct removal tool for that design.
For owners of Ford F-250 Super Duty trucks in the United States, removing a track bar ball joint is a suspension repair that calls for careful support, the right tools, and model-specific service information. The track bar helps keep the solid front axle centered beneath the truck. A loose or damaged joint can affect steering stability, so the repair deserves more care than a routine bolt removal.
The exact procedure depends on the model year, drivetrain, front suspension design, and whether the joint is removable separately or supplied as part of the track bar. Some versions use a tapered stud at the axle bracket. Others require a ball joint press and a C-frame-style installer or remover after the track bar has been taken off the truck. These procedures are related, but they are not interchangeable.
This guide explains how to disconnect the track bar, separate its ball-joint connection, and remove a serviceable joint when the design allows it. It also covers seized fasteners, a spinning stud, safe axle support, and the checks needed before the truck returns to the road. Use the Ford service procedure for your exact year and configuration whenever its instructions differ from this general guide.
Understand the F-250 Track Bar Ball Joint Before Starting
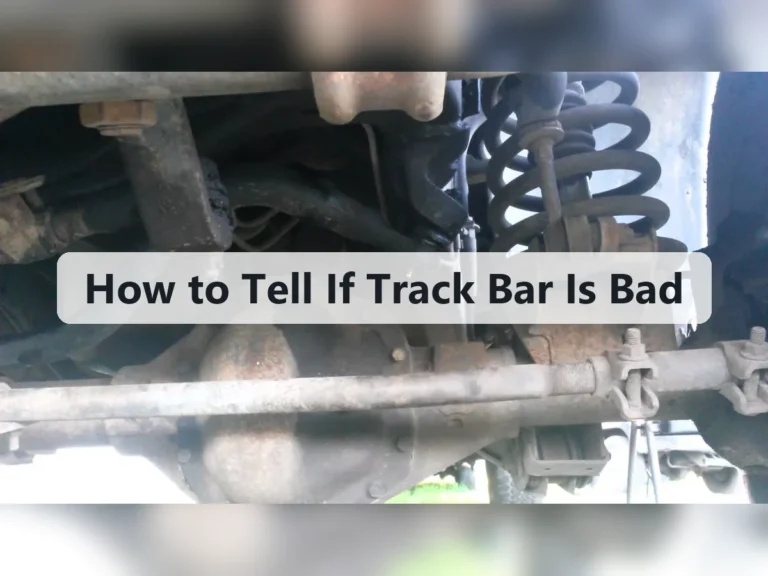
The track bar, also called a panhard bar, is a suspension link that limits side-to-side movement of a solid axle. One end attaches to the vehicle frame or a frame-mounted bracket. The other connects to the axle assembly. Its job is to keep the axle positioned correctly as the suspension moves up and down.
The ball joint provides a pivoting connection where the design uses one. It allows the suspension to move without binding while helping maintain the intended axle position. Wear, corrosion, a damaged boot, or a loose mounting connection can lead to unwanted movement.
Do not confuse the track bar ball joint with the steering linkage ball joints or the front wheel ball joints. They may look similar, but they serve different purposes and can require different tools and removal procedures.
A key distinction is whether you are removing the track bar from its mounting stud or removing the ball joint from the track bar itself. The first task separates the connection at the bracket. The second may require pressing the joint out of the component after the track bar is removed.
Source: i.ytimg.com
Track bar-to-bracket connection
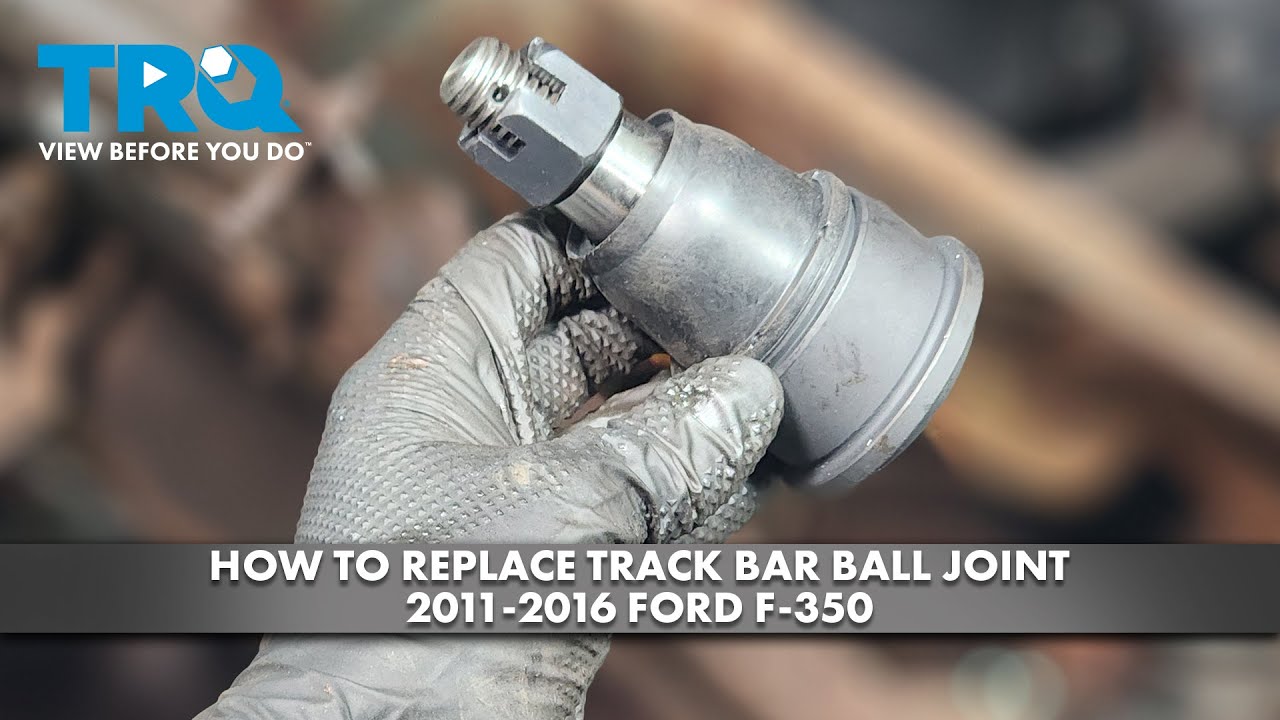
This connection is normally secured by a nut and bolt or by a ball-joint stud and retaining nut, depending on the design. A suitable puller may be needed to separate a tapered stud.
Serviceable track bar ball joint
Some designs allow the joint to be pressed out and replaced separately. The correct press adapters and removal direction depend on the component.
Integrated or nonserviceable assembly
If the joint is not supplied or approved for separate replacement, the appropriate repair may be replacement of the complete track bar assembly.
Why Model Year Matters
Ford has used different front suspension layouts and service procedures across F-250 generations. A method shown for a 2008-2010 truck should not automatically be applied to a 2017 or newer model. Two trucks that look alike can also differ in drivetrain and component details.
Before buying a tool or loosening a fastener, identify the model year, engine, and whether the truck has four-wheel drive or rear-wheel drive. Confirm the correct service procedure and replacement part using the vehicle identification number when needed.
Check the joint design
Determine whether the ball joint has a tapered stud, a pressed housing, a removable grease fitting, or a boot that must be protected during service.
Verify serviceability
Check whether Ford specifies replacement of the joint alone or the entire track bar. Do not force a joint out of an assembly that is not designed to be serviced that way.
Tools and Supplies Needed for Track Bar Ball Joint Removal
Gather the correct tools before lifting the truck. Having the right separator and support equipment helps prevent damage to the bracket, threads, boot, and surrounding suspension parts.
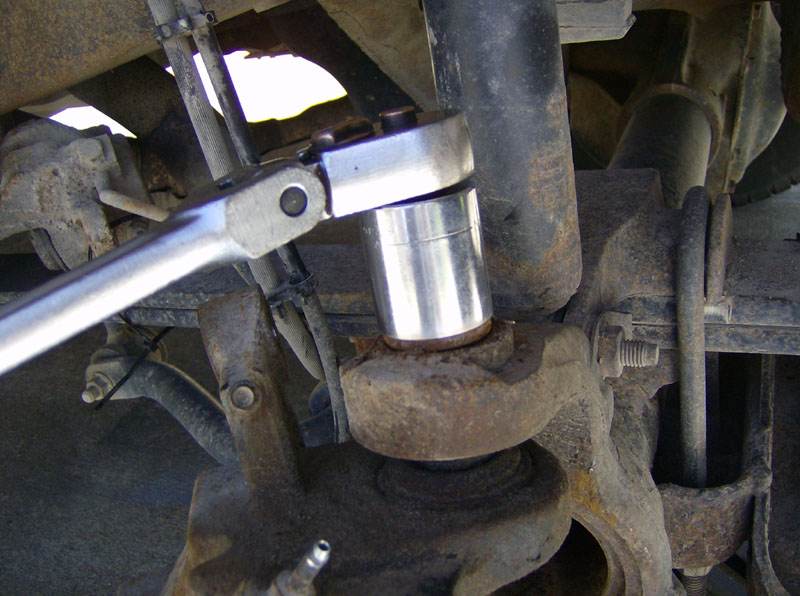
The tools needed depend on whether you are disconnecting a tapered joint or pressing a joint out of the track bar. A general socket set may handle the retaining hardware, but it cannot replace a properly sized separator or press.
Source: frontiernet.net
Vehicle support equipment
Use a level, solid work surface, a properly rated vehicle lift or floor jack, and correctly rated jack stands or axle stands positioned at the approved support points.
Hand tools
Prepare the correct metric sockets, combination wrenches, breaker bar, and a torque wrench with a suitable range for final assembly.
Joint separator
Use a steering arm puller or separator that fits the track bar’s tapered stud and mounting bracket. A fork-type separator may damage a boot that will be reused.
Ball joint press
Use a suitable C-frame ball joint press and the correct adapters if the joint is pressed into the track bar or bracket.
Penetrating fluid and cleaning supplies
These can help with external corrosion and dirt. Keep chemicals away from brake friction surfaces and follow the product instructions.
Personal protective equipment
Wear safety glasses and suitable gloves. Keep hands and feet clear of the axle and any loaded suspension parts.
Can You Remove the Joint Without a Ball Joint Press?
Sometimes. If the task is only to disconnect a tapered track bar stud from its bracket, a suitable steering arm puller may be enough. The stud remains part of the joint, and the tool separates its tapered seat.
A press is usually needed when a separate ball joint must be pushed out of a track bar or mounting housing. Do not try to substitute a hammer for a press when the joint is designed to be pressed out. Incorrect force can deform the housing or damage the replacement mounting surface.
Puller needed
Use a correctly sized separator when removing the track bar from a tapered ball-joint stud.
Press needed
Use the specified press and adapters when removing a pressed-in ball joint from a serviceable assembly.
Prepare the Truck and Support the Front Axle Safely
Park the F-250 on firm, level ground before beginning. Set the parking brake, place the transmission in Park or the appropriate gear, and chock the wheels that will remain on the ground. Keep the keys under your control so nobody can start or move the truck during the repair.
Follow the lifting and support instructions for the exact truck. The front axle must be controlled because disconnecting the track bar can allow the axle to shift sideways or change position. The suspension may also store energy or carry a load that changes as the joint separates.
Ford service procedures for applicable solid-axle models call for supporting the axle so its weight is carried by suitable stands during track bar removal. Some procedures specify support on both sides of the axle. Follow the instructions for your configuration rather than assuming that a single jack under the differential is sufficient.
Never work beneath a truck held up only by a hydraulic floor jack. Before placing any part of your body under the vehicle, confirm that all support points are stable and that the truck cannot roll or settle.
Source: i.ytimg.com
Step 1: Confirm the work area
Clear loose tools and debris, check that the floor is level, and make sure the lifting equipment has adequate capacity.
Step 2: Inspect the mounting area
Locate the track bar and identify the frame-side connection, axle-side connection, nearby brake hoses, wiring, steering linkage, and stabilizer components.
Step 3: Support the front axle
Raise and support the truck according to its service manual. Position the approved stands so the axle cannot drop or shift unexpectedly.
Step 4: Control axle position
Use an appropriate jack or support arrangement to make small, controlled adjustments if needed. Keep the axle stable before loosening the final fastener.
Why the Axle Must Be Supported
The track bar resists lateral movement of the axle. When its connection is released, that restraint is removed. If the axle shifts, the bar may bind, the holes may no longer line up, and nearby components can be placed under unintended strain.
If the joint is loaded and refuses to separate, stop and check the support arrangement. Adjust the axle position gradually with approved equipment. Do not place your fingers between the bar and bracket while trying to line up the holes.
Safe condition
The truck and axle remain stable, the suspension is supported as directed, and no component is carrying an uncontrolled load.
Unsafe condition
The axle moves suddenly, a stand shifts, the truck rocks, or the track bar springs away from its mounting point. Stop work and restore safe support before continuing.
How to Remove the Track Bar Ball Joint From an F-250
The basic removal process is to disconnect the track bar, separate its ball-joint stud from the bracket, and then remove the joint from the bar if the design allows separate service. The exact order of the fasteners and any components that must be moved depends on the model-year service instructions.
The steps below describe the general process for a serviceable design. Do not use them to override a Ford procedure that specifies a different support point, removal direction, special tool, or hardware replacement requirement.
Source: i.ytimg.com
Step 1: Identify the Track Bar Connections
Find the bar running laterally between the frame or frame bracket and the front axle assembly. Check both ends and note how the bar is retained. Some designs use a ball-joint stud at one end and a conventional bolt at the other.
Take a photo of the mounting orientation before disassembly. Note any washers, sleeves, spacers, brackets, or clips, but do not assume every part should be reused. The service manual determines which parts are single-use.
Check the stud
Look for a hex feature or another approved way to hold the stud against rotation while removing the nut.
Check nearby parts
Identify any shock absorber or stabilizer link hardware that the applicable service procedure requires you to remove for access.
Step 2: Loosen the Retaining Hardware
Clean dirt and loose rust from the exposed threads. Apply a suitable penetrating fluid to corroded external threads if needed, keeping it away from brake components and rubber parts that the product may damage.
Use the correct socket or wrench to loosen the track bar fasteners. If the stud starts spinning, use its designed hex-holding feature or the specified holding tool. Do not grip a polished ball-joint stud with locking pliers, because damaged surfaces and threads can make reassembly unreliable.
Where Ford specifies that a nut or bolt must be discarded, plan to install a new one. A fastener that appears undamaged may still be designated for one-time use.
Work steadily
Apply controlled force with the correct tool. If the fastener begins to round off, stop before the damage becomes worse.
Do not remove every fastener at once
Keep the assembly controlled until the axle support is confirmed and the bar can be separated without an uncontrolled shift.
Step 3: Disconnect the Track Bar From the Bracket
After removing the specified retaining nut and bolt, use a suitable steering arm puller to separate the tapered stud from the bracket. Position the tool squarely so its force acts along the intended separation path.
A tapered joint can remain tight after the nut is removed. That resistance does not necessarily mean the stud is seized permanently. The taper may be firmly seated under load, which is why a correctly fitted separator is preferable to uncontrolled hammering.
On some F-250 configurations, the bar may need to be rotated or repositioned slightly to fit the separator. Make only controlled movements while maintaining axle support. Protect nearby brake lines, wiring, and rubber boots.
Signs of correct separation
The tapered stud releases from its seat, the bar can be moved without binding, and the bracket shows no new cracks or distortion.
If the stud will not release
Confirm that the tool is correctly seated and the axle load is controlled. Reposition the tool if needed, but do not use the retaining nut as a substitute for the proper separator.
Step 4: Remove the Track Bar
Once the joint connection is free and the opposite mounting hardware has been removed as directed, carefully take the track bar out of its mounting points. It may be heavy or awkward to handle, so support it rather than allowing it to fall.
Keep the bar and its hardware organized. Inspect the frame bracket, axle-side mounting surface, bolt holes, and nearby components for wear, corrosion, cracks, or signs of movement. A worn mounting hole will not be corrected by fitting a new ball joint alone.
Protect the threads
Avoid dragging the stud across the bracket or striking exposed threads against the axle.
Check the mounting holes
Look for oval-shaped holes, damaged threads, cracked welds, or metal that has shifted around the fastener.
Step 5: Remove the Ball Joint From the Track Bar
This step applies only when the ball joint is designed to be serviced separately. Secure the removed track bar in a stable work position, following the service procedure for the component. Remove a grease fitting if the instructions require it, and remove the boot only if specified.
Some Ford procedures require additional access by disconnecting a shock absorber lower fastener or a stabilizer link and lowering the axle enough to fit the C-frame tool. These steps are model-specific. Do not remove those parts automatically unless the procedure for your truck calls for them.
Fit the correct C-frame ball joint press and adapters squarely against the joint housing and receiving side. Check the tool alignment before applying force. Press the joint in the direction specified by the service procedure, keeping the boot, bracket, and surrounding parts clear of the adapters.
If the joint binds, the press tilts, the housing starts to deform, or the tool reaches its limit, stop. Recheck the adapter size, removal direction, and part design. Excessive force can damage a track bar that might otherwise have remained serviceable.
Remove the joint evenly
Keep the press aligned and use adapters that bear on the intended housing surfaces rather than the ball stud or thin edges.
Protect the boot and fitting
Remove the grease fitting when instructed before pressing. Avoid pinching, cutting, or stretching the replacement boot.
Replace the complete bar when required
If the ball joint is integrated or is not listed as separately serviceable, use the approved complete-assembly repair instead of forcing it apart.
How to Remove a Stuck or Spinning Track Bar Ball Joint
A stuck joint usually calls for better tool alignment, correct axle positioning, or careful corrosion treatment rather than more force. First decide whether the fastener is stuck, the stud is spinning, or the tapered joint remains seated. Each problem needs a different response.
Stop if the bracket begins to bend, the stud threads become damaged, or the separator cannot be held square. A damaged suspension mounting point can create a larger repair than the original worn joint.
Source: i.ytimg.com
If the Ball Joint Stud Spins
A ball-joint stud may spin because the taper has not seated firmly enough to provide friction, or because the joint has already become worn. Use the designed hex-holding feature or the specified holding tool while turning the retaining nut.
If the nut is badly corroded or the stud’s holding feature is damaged, do not continue applying uncontrolled torque. The correct extraction method may depend on whether the joint will be replaced and whether the surrounding bracket can be protected.
Use the intended holding point
Hold the stud with the correct wrench or tool while loosening the nut. Avoid damaging the polished surface or boot.
Stop if the nut rounds off
A rounded nut may require a dedicated extraction socket or professional removal method. Protect nearby parts from tool slips.
If the Tapered Joint Will Not Separate
Check that the axle is supported correctly and that the separator is designed for the joint. The tool should contact the intended surfaces without slipping toward the boot or threads.
If the service procedure permits, a controlled strike on the robust bracket area may help release a tapered seat when used with the correct puller and suitable protection. Do not strike the ball-joint stud directly or hit the bracket hard enough to bend it. Follow the model-specific service instructions and avoid this technique if the tool manufacturer or vehicle procedure prohibits it.
Recheck tool fit
A separator that is too large, too small, or poorly aligned can slip and damage the joint or bracket.
Check for side load
If the bar is pulling against the joint, adjust the supported axle position gradually until the connection is no longer under unintended strain.
If a Pressed-In Joint Will Not Move
Confirm that the press adapters support the correct surfaces and that the joint is being pressed in the specified direction. Corrosion can make a joint stubborn, but forcing a misaligned press can deform the housing or cause the tool to slip.
Do not use an open flame or uncontrolled heat near suspension parts, rubber components, grease, brake hoses, or other nearby equipment. If the joint remains stuck after the tool and direction have been checked, seek a shop equipped for heavy-duty suspension work.
Stop when the housing distorts
A bent or cracked housing must not be returned to service. Assess whether the complete track bar needs replacement.
Use professional extraction when needed
Severe corrosion, damaged threads, or a seized joint can justify specialist tools and controlled removal methods.
Inspect the Track Bar and Mounting Brackets Before Reassembly
After removing the joint, inspect the full track bar assembly rather than focusing only on the worn part. A new joint cannot compensate for a cracked bar, an elongated mounting hole, damaged threads, or a loose frame bracket.
Check the ball stud, joint housing, boot, and grease fitting if equipped. Look for corrosion, scoring, looseness, torn rubber, grease leakage, or evidence that the stud has moved in its mounting seat. Follow the part manufacturer’s inspection limits where available.
Inspect the axle and frame brackets for cracks, bent metal, rust damage, and polished areas that suggest repeated movement. Also examine nearby brake hoses, wiring, steering links, and shock absorber mounts for damage caused by the failed component or removal process.
Source: i.ytimg.com
Replace damaged hardware
Use the correct replacement fasteners wherever the service procedure specifies new hardware. Match the required grade, dimensions, and design.
Check the mounting surfaces
Remove loose dirt and corrosion without removing sound metal or altering the shape of the mounting hole.
Confirm replacement compatibility
Match the replacement joint or track bar to the exact truck configuration and verify that it is approved for the intended mounting position.
Do not reuse a questionable joint
A joint with excessive play, a damaged stud, a failed boot, or a distorted housing should not be reinstalled.
Can You Replace Only the Ball Joint?
Yes, if the exact track bar design permits separate joint replacement and a compatible service part is available. This can avoid replacing a sound bar solely because its joint has worn out.
However, separate replacement is not suitable for every F-250. If the joint is integrated into the bar or the manufacturer specifies complete-assembly replacement, install the approved assembly. Also consider the condition of the bar and brackets before deciding that the joint alone is the problem.
Separate joint replacement
Suitable when the joint is serviceable, the housing is sound, and the correct replacement and installation tools are available.
Complete track bar replacement
Appropriate when the joint is nonserviceable, the bar is damaged, or the approved repair calls for the complete assembly.
Reinstall the Ball Joint and Track Bar Correctly
Removal is only half the job. The replacement joint and track bar must be installed with the correct orientation, hardware, and tightening procedure. An improperly seated joint or loose track bar fastener can affect axle location and steering control.
Use the model-specific Ford service manual for installation order, torque values, and any required new nuts or bolts. Do not borrow a torque figure from another F-250 model year or from a different fastener simply because the parts look similar.
Source: i.ytimg.com
Install a Pressed-In Ball Joint
Clean and inspect the receiving bore before installing the replacement. Confirm the joint’s orientation and the correct pressing direction. If the new joint includes a boot, keep it attached unless the instructions specifically require otherwise.
Use the specified C-frame press and adapters to seat the joint evenly. Remove the grease fitting before pressing if required to prevent damage. Do not force the fitting or boot against an adapter, and do not continue if the housing begins to distort.
Install the grease fitting if supplied and required. Apply grease only as directed for the specific joint; some replacement joints have different lubrication requirements.
Check seating
The joint should sit in its intended position without visible tilting, housing damage, or a pinched boot.
Protect the joint
Make sure the boot is intact and the grease fitting is not bent or blocked.
Reconnect the Track Bar
Position the track bar at the correct mounting points and install the specified fasteners. If the holes do not align, adjust the axle position gradually with approved support equipment. Do not pull the axle into alignment by using the bolt threads as a winch.
Start all fasteners by hand where possible to prevent cross-threading. Tighten them in the sequence and to the torque values listed for the exact vehicle. Replace any one-time-use hardware that was removed, including specified nuts, bolts, or prevailing-torque fasteners.
If the procedure requires removing a shock absorber lower bolt or stabilizer link nut for access, reinstall those components using the specified replacement hardware and torque values. Check that the shock, stabilizer link, brake hoses, and wiring are correctly positioned.
Use verified torque specifications
Obtain values from the correct Ford service information or an authoritative procedure for the exact model year and suspension configuration.
Avoid guessing
Do not use a generic torque chart or an unrelated online video as the final authority for critical suspension fasteners.
Final Safety Checks Before Driving the F-250
Before lowering the truck, check every fastener and confirm that the track bar is fully seated at both ends. Verify that the correct replacement hardware is installed and that no tools, loose parts, or support equipment remain trapped around the suspension.
Lower the vehicle according to the lifting procedure. Inspect the front suspension again at normal ride height where the service instructions require it. Check that the steering linkage and brake hoses have adequate clearance through the permitted range of movement.
If the truck had steering wander, clunks, or axle movement before the repair, do not assume that replacing the joint has corrected every fault. Other worn steering or suspension components can cause similar symptoms. A qualified technician should investigate any remaining looseness or instability.
Source: i.ytimg.com
Inspect all fasteners
Verify that each critical fastener is installed and tightened to the correct specification, with new hardware where required.
Check steering movement
Confirm that the steering moves as intended and that no hose, wire, or suspension component is pinched or contacting another part.
Check for abnormal movement
Look for a loose track bar, a shifting bracket, a damaged boot, or visible movement at the joint.
Arrange further inspection if needed
If steering looseness, severe vibration, or instability remains, do not continue normal driving until the cause has been identified.
Does Removing the Track Bar Affect Wheel Alignment?
The track bar controls lateral axle position, while wheel alignment describes angles such as toe, camber, and caster. Removing the track bar does not automatically mean every alignment angle has changed, but an axle that is not centered correctly can affect the vehicle’s position and handling.
If the suspension has been modified, the track bar length has changed, the axle sits off-center, or the truck still pulls or handles poorly, arrange an appropriate steering and suspension inspection. Follow the requirements for any alignment check after the repair.
Check axle centering
Use the vehicle or suspension manufacturer’s specified method, especially if the truck has a lift kit or adjustable track bar.
Investigate persistent symptoms
Do not use an alignment adjustment to hide a loose joint, damaged bracket, worn steering part, or incorrect track bar installation.
Frequently Asked Questions
Q
Can I remove an F-250 track bar ball joint with a hammer?
A hammer alone is not the preferred method for separating a tapered track bar joint or pressing a joint out of its housing. Use the correct steering arm puller for the tapered connection and the specified press for a serviceable pressed-in joint. Uncontrolled hammering can damage the stud, bracket, threads, or housing.
Q
What if the F-250 track bar ball joint nut will not come off?
Clean the exposed threads and use an appropriate penetrating fluid if corrosion is present. Use the correct socket and hold the stud at its intended hex feature if it starts spinning. If the nut rounds off, the stud or bracket is damaged, or the fastener remains seized, stop and use a suitable extraction method rather than applying uncontrolled force.
Q
Do I need to remove the entire track bar to replace the ball joint?
For many serviceable designs, removing the track bar gives the access needed to press the joint out safely. Ford procedures for some configurations specify removing the bar first and then using a C-frame ball joint tool. Confirm the procedure for your truck because an integrated joint may require complete track bar replacement.
Q
Can I drive with a bad track bar ball joint?
Driving with a loose or badly worn track bar ball joint can compromise axle location and steering stability. Do not drive the truck if the joint is visibly loose, the mounting hardware is damaged, or the vehicle has severe steering instability. Arrange safe transport to a repair facility if the condition makes driving unsafe.
Q
Do I need an alignment after replacing the track bar ball joint?
A joint replacement does not automatically require adjustment of every wheel alignment angle. However, axle centering, suspension modifications, and remaining steering symptoms may call for additional checks. Follow the applicable Ford procedure and have the steering and suspension inspected if the truck does not track or handle normally.
Q
Can I reuse the original track bar bolts and nuts?
Only when the applicable service procedure permits reuse. Some Ford suspension procedures explicitly require specified nuts and bolts to be discarded and replaced. Use the correct replacement hardware and torque specifications rather than judging reusability by appearance alone.
✦ Wrapping Up
Conclusion
To remove a track bar ball joint from a Ford F-250, first identify the exact suspension design, support the front axle safely, disconnect the track bar, and separate the tapered connection with the correct tool. If the joint is pressed into a serviceable assembly, use the specified C-frame press and adapters to remove it without damaging the housing.
The most important factors are safe axle support, correct tool alignment, proper handling of corroded or spinning fasteners, and compliance with the vehicle-specific service procedure. Do not force a joint that is not designed for separate replacement, and do not guess at critical torque values.
After removal, inspect the track bar and its brackets for wear or damage. Reinstall the approved replacement parts with the required hardware, verify the fasteners, and check steering and suspension operation before returning the truck to service.
💡 Key Takeaway
Before starting, confirm the F-250 model year and joint design, obtain the correct Ford service procedure, and prepare the approved axle supports and joint removal tools. If the axle cannot be secured or the joint will not release without excessive force, stop and seek qualified heavy-duty suspension service.
Eric
Hi, I’m Eric Bennett, the person behind OffRoadTruckAccessories.com.
I created this blog to share my interest in trucks, off-road driving, automotive accessories, and DIY modifications. I enjoy learning how different truck accessories work, testing their usefulness, and understanding whether they are truly worth buying.