
How to Install Coilovers Integra: A Practical Step-by-Step Guide
Installing coilovers on an Integra can transform a worn or overly soft suspension into a more controlled setup, but the result depends on more than bolting in four new assemblies. Ride height, spring preload, hardware torque, brake-line routing, and alignment all affect whether the car is safe and predictable afterward.
This job is realistic for a careful beginner with a sturdy jack, jack stands, hand tools, and enough time to check each detail. The exact procedure varies between DC2 Integras, later Acura RSX models, and aftermarket coilover designs, so the manufacturer’s instructions and the factory service information take priority whenever they differ from a general explanation here.
This guide explains how to install coilovers integra owners commonly use, from confirming compatibility and safely lifting the car through setting the height and checking the finished installation. You will also learn which results are normal, which symptoms mean you should stop driving, and why a professional four-wheel alignment is part of completing the job rather than an optional extra.
At a glance
- Support the car on properly positioned jack stands before removing any suspension fasteners.
- Use the coilover body or lower mount for height adjustment when the manufacturer specifies it; do not randomly compress the spring.
- Drive only far enough for a basic check before getting a full alignment and rechecking the hardware.
How to install coilovers integra owners can set up safely
The safest method is to replace one axle at a time, keep the opposite side assembled as a visual reference, and compare every new part with the original before installation. Do not begin by chasing an extreme drop. Start near the manufacturer’s recommended baseline so the suspension has usable travel and the alignment remains within a range that can be corrected.
Tools you will need
- Vehicle-specific service information and the coilover manufacturer’s instructions for torque values, orientation, and adjustment limits
- Floor jack and four appropriately rated jack stands for supporting the vehicle
- Wheel chocks to prevent movement while one end of the car is lifted
- Socket and wrench set, including the sizes used on the original suspension hardware
- Torque wrench for final tightening
- Penetrating oil and a wire brush for dirty or corroded fasteners
- Hex keys or pass-through tools if required to hold a damper shaft while loosening a nut
- Ruler or tape measure for recording ride height
- Optional: paint marker or masking tape for labeling brake-line and sensor routing
Step 1 Confirm the parts, application, and adjustment design
Park on a level, hard surface and compare the coilovers with the car before lifting it. Confirm the kit is intended for your exact chassis, body style, and drivetrain where applicable. A DC2 Integra kit is not automatically correct for every Honda or Acura suspension that looks similar, and an RSX kit should not be treated as a DC2 kit without explicit manufacturer confirmation.
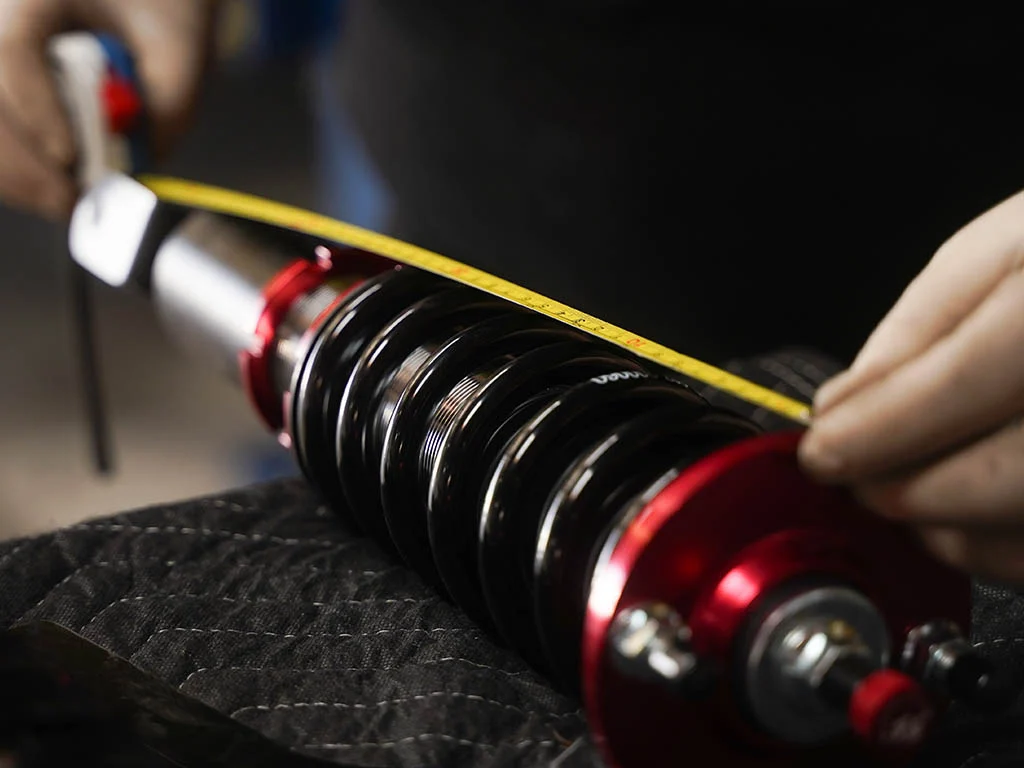
Lay out the four assemblies and identify front versus rear, left versus right if the instructions specify sides, and any separate rear springs or upper mounts. Check that the threads are clean, the locking collars move with the supplied wrench, and no damper body, shaft, spring, or mount is bent or damaged. If a part is missing or the application is uncertain, stop before disassembly.
Measure from the center of each wheel hub vertically to the lower edge of the fender. Hub-to-fender measurements are more useful than measuring from the ground because tire pressure and tire size do not affect them. Record all four numbers and photograph the original suspension and brake-line routing.
Step 2 Read the instructions and set a conservative starting height
Coilover kits use different height-adjustment methods. Some change height by moving a threaded lower mount while preserving spring preload; others use threaded shock bodies, separate spring perches, or a combination. Follow the supplied instructions rather than assuming every collar has the same purpose.
Set the assemblies close to the kit’s recommended starting position while they are on the bench. Keep enough thread engagement in every adjustable mount, and do not adjust beyond the manufacturer’s minimum or maximum range. The springs should remain captured when the suspension is unloaded unless the kit specifically permits another arrangement.
A lower ride height is not automatically better. Excessive lowering can reduce bump travel, cause the tire to contact the fender or chassis, change suspension geometry, and leave the damper operating outside its useful range. A modest initial drop gives you room to inspect clearances and make a sensible adjustment later.
Step 3 Lift the Integra and remove the wheels
Place the transmission in gear or Park, set the parking brake, and chock the wheels that remain on the ground. Break the wheel lug nuts loose slightly before lifting, then raise the vehicle at the approved jacking points and place jack stands under strong structural support points identified by the service information.
Lower the car gently onto the stands and give it a careful push at the body to confirm that it is stable. Never rely on the floor jack alone, and never place a jack stand under a thin floor panel, suspension arm that must move freely, or an uncertain location.
Remove the wheels and store the lug nuts where dirt cannot enter the threads. Keep the floor jack available because it can support a control arm or hub temporarily during removal, but do not use it as the primary support for your body or the vehicle.
Important
Stop if a support point is rusted through, a suspension fastener is severely rounded, or the car cannot be supported solidly. A suspension installation is not a safe job to improvise around structural damage.
Step 4 Remove the original front struts
Begin on one front corner. Identify anything attached to the strut or steering knuckle, such as a brake hose bracket or wheel-speed sensor wire, and free it before the strut is moved. Do not let the brake hose hang under tension, and do not twist or pull the sensor wire.
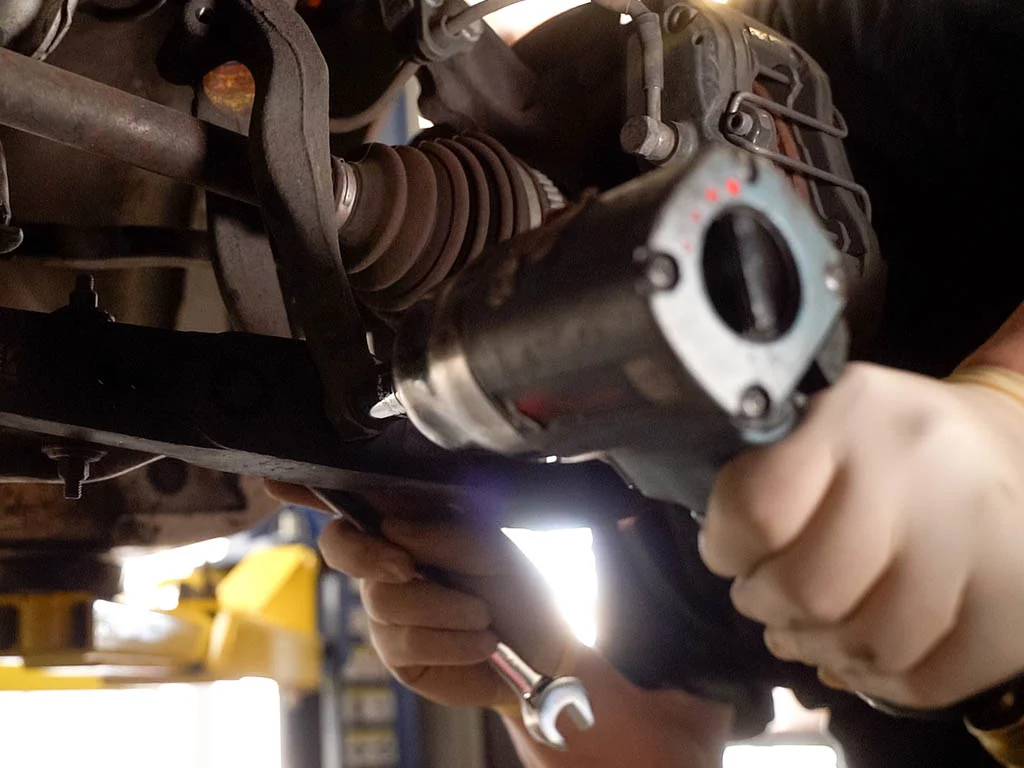
Support the steering knuckle or lower control arm with the floor jack before removing the main lower fasteners. Then remove the lower strut-to-knuckle hardware and the upper mounting nuts from the engine-bay tower, following the vehicle’s service procedure. Leave one upper fastener loosely engaged until you are ready to control the assembly.
Guide the original strut out without forcing the knuckle outward. Compare its mounting holes, bracket positions, and overall length with the replacement. If the new coilover includes a separate top mount, camber plate, or bearing, install it in the orientation shown by the manufacturer; an incorrectly oriented plate can create poor adjustment range or interference.
Step 5 Install and secure the front coilovers
Position the new front assembly in the tower and loosely install the upper hardware by hand. Align the lower mount with the steering knuckle, insert the original or supplied fasteners in the correct direction, and start the nuts without cross-threading them. A useful way to approach how to install coilovers integra is to check your progress after each stage.
Use the jack under the knuckle to bring the mounting holes into alignment rather than pulling the parts together with the bolts. Tighten the fasteners in stages, then torque them with the suspension supported as required by the manufacturer. Some hardware is tightened with the vehicle at normal ride height, while other fasteners are specifically torqued while unloaded; the instructions determine which applies.
Reconnect every brake hose bracket and sensor-wire retainer. Turn the steering from lock to lock and watch for stretching, pinching, or contact. The hose and wire should follow their intended path with slack through steering movement, and the coilover should not touch the tire, wheel, knuckle, or body.
Step 6 Replace the rear springs and dampers
Move to the rear axle and support the relevant suspension arm with the jack before removing its load-bearing fasteners. Depending on the Integra chassis and coilover design, the rear setup may use a separate spring and damper rather than a single front-style strut. Do not assume the front removal sequence applies to the rear.
Remove the original rear damper and spring according to the service information. Keep track of rubber isolators, upper mounts, washers, sleeves, and spacers; some kits reuse factory pieces while others replace them. A missing isolator can create noise, misalignment, or an unsafe mounting condition.
Install the rear spring, adjuster, and damper in the order shown by the kit instructions. Make sure the spring ends sit fully in their seats and that any pigtail end points in the correct direction. Tighten the upper and lower mounts to the specified torque, supporting the arm so the hardware is not forced into position at an unnatural angle.
Step 7 Check clearance, threads, and lock collars
Before reinstalling the wheels, inspect all four corners closely. Look for adequate clearance between the tire and spring, damper body, brake hose, sensor wire, sway-bar link, and inner fender. Check clearance with the steering straight and turned fully left and right at the front.
Confirm that every adjustable collar is seated against the correct mating surface and that the lock collars are tightened as directed. Do not use a hammer and punch on aluminum collars unless the manufacturer explicitly permits it; damaged threads can make later adjustment difficult or compromise the locking function.
Compare left and right adjustment positions. The threads do not need to show exactly the same amount if the chassis or kit design requires a small correction, but a large unexplained difference suggests an installation or measurement problem.
Step 8 Reinstall the wheels and lower the car gradually
Install the wheels and tighten the lug nuts by hand, then snug them in a crisscross pattern while the vehicle is still supported. Remove tools from beneath the car, raise it slightly, remove the jack stands, and lower it slowly onto the ground.
Torque the lug nuts to the vehicle’s specified value using a calibrated torque wrench. Do not use the wheel impact gun for final tightening. Once the car is on the ground, roll it forward and backward a short distance or gently bounce each corner so the suspension settles.
Measure hub-to-fender height again at all four corners. Compare the results with your original measurements and with the kit’s intended range. If one corner is dramatically different, do not compensate by making random adjustments; inspect spring seating, mount orientation, and the adjustment procedure first.
Step 9 Settle the suspension and perform the first inspection
With the engine off, turn the steering through its full range and listen for binding, scraping, or a spring that shifts in its seat. Look underneath for contact marks and confirm that no brake hose, sensor wire, or underbody panel is touching a moving part.
Perform a very short, slow test on a quiet surface near your work area. Avoid hard braking, high speed, and uneven roads at first. Pay attention to clunks, metallic rubbing, steering that does not return normally, pulling, or a corner that sits visibly low.
Understanding how to install coilovers integra also means recognizing the limits of the method.
Return immediately and inspect the hardware and clearances. A quiet test drive does not prove that the alignment is correct, so treat this only as a basic installation check. The next essential step is a professional four-wheel alignment, especially if the car was lowered or the kit includes adjustable camber plates.
What changes when an Integra gets coilovers
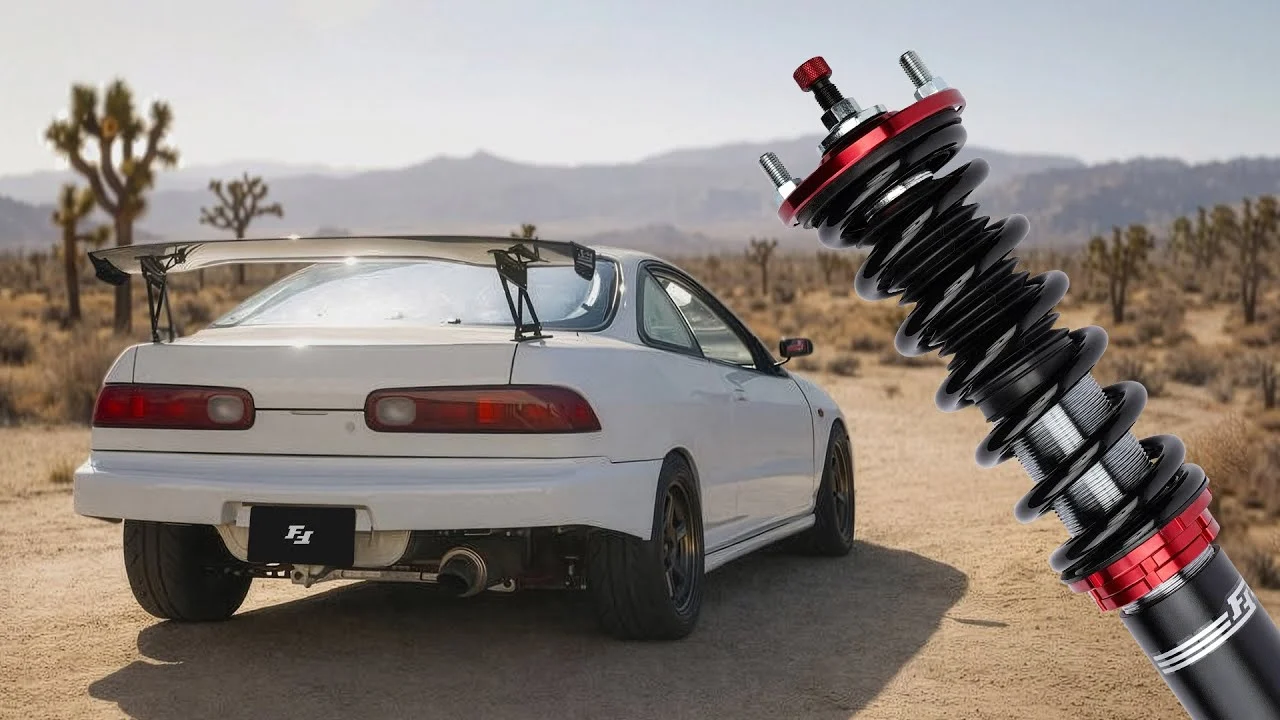
Coilovers combine a spring and a damper in an adjustable assembly. The spring supports the vehicle’s weight, while the damper controls how quickly the suspension compresses and rebounds. Many kits also allow ride-height adjustment, and some provide adjustable damping or upper mounts that change camber.
On an Integra, lowering changes suspension geometry as well as appearance. Toe, camber, roll-center position, bump travel, and the relationship between the steering and suspension can all change. That is why a car can feel different—or wear tires quickly—even when every fastener is tight.
Ride height is not spring preload
Spring preload is the amount a spring is compressed when the suspension is extended and the assembly is installed. Ride height is the position of the vehicle once its weight is on the wheels. On a height-adjustable coilover, the preferred design usually changes ride height through the lower mount or threaded body so the spring remains in its intended working range.
Lowering a spring perch to force the car down can create insufficient preload, allow the spring to become loose when the wheel hangs, or reduce usable suspension travel. If the kit uses a separate height collar and spring perch, identify each one before turning it.
Damper settings need a sensible baseline
If the coilovers have adjustable damping, begin at the manufacturer’s recommended setting rather than turning every adjuster to its hardest position. Damping controls suspension motion; it does not directly increase spring rate or correct inadequate bump travel.
Make changes in small, documented increments and keep the settings equal side to side unless the manufacturer or a qualified suspension technician gives you a reason to do otherwise. A harsh ride can result from too much damping, too little travel, excessive spring rate, or tire pressure—not just from one adjustment.
How to verify the finished installation
The installation is complete only when the hardware is secure, the suspension moves without interference, and the vehicle receives an alignment appropriate for its intended use. A professional alignment also provides measurements that reveal whether the ride height or camber settings need correction.
Use a post-installation checklist
- All upper and lower suspension fasteners are torqued to the applicable specifications.
- Wheel lug nuts are torqued correctly.
- Brake hoses and wheel-speed sensor wires are secured and free from stretching.
- Springs are seated correctly at both ends.
- Lock collars are tight and have usable thread engagement.
- Tires and wheels clear the suspension through steering movement.
- No damper, spring, mount, or adjuster contacts the body.
- The steering wheel is not severely off-center during the slow test.
- The vehicle has a four-wheel alignment scheduled before normal spirited driving.
Check your result
A good basic result is a car that sits evenly, rolls without scraping, steers normally, and produces no new clunks or pulling during a cautious test. Those observations do not replace torque verification or an alignment.
Know when to use a professional alignment
Ask for the alignment after the suspension has settled at the ride height you intend to keep. Tell the shop whether the car is primarily street-driven, used for autocross, or built for track use, because the appropriate settings and tire-wear compromise differ.
If adjustable camber plates or rear adjustment hardware are installed, have the shop inspect the available range rather than simply setting toe. The technician should also check that the steering wheel is centered and that the readings are reasonably consistent from side to side.
Common problems after coilover installation
New noises and handling changes are useful clues, but they should not be dismissed as normal without inspection. The table below narrows down common symptoms without replacing a physical check of the vehicle.
| Symptom | Likely areas to inspect |
|---|---|
| Clunk over bumps | Loose mount or lock collar, incorrectly seated spring, sway-bar link, or hardware tightened in the wrong position |
| Scraping while turning | Tire-to-spring or tire-to-inner-fender clearance, brake hose routing, sensor wire, or excessive lowering |
| Car pulls or steering wheel is off-center | Alignment change, unequal ride height, tire issue, or a fastener that was not fully secured |
| One corner sits low | Different adjustment height, spring not seated, incorrect component placement, or a chassis/load difference |
| Very harsh ride | Insufficient travel, excessive damping, spring rate mismatch, low tire sidewall, or an overly low setting |
If the car pulls sharply, the steering binds, a brake hose is stretched, a spring is loose at full droop, or a suspension component contacts the tire, stop driving it. Raise the issue with the installer or a qualified technician before making further adjustments.
Frequently asked questions
Can I install coilovers without an alignment?
You can perform the mechanical installation without aligning the car immediately, but you should not treat the vehicle as finished. Ride-height changes commonly alter toe and camber, so drive only cautiously to an alignment shop after confirming that the car has no clearance or hardware problems.
Should the coilover spring be loose when the car is lifted?
Usually, the spring should remain captured between its seats when the suspension is at full droop. A small amount of movement may be permitted by a particular design, but a spring that can fall out or is clearly loose requires you to recheck the adjustment instructions before driving.
How low should I set an Integra on coilovers?
Use the manufacturer’s recommended range and preserve practical bump travel and tire clearance. The best height is the lowest setting that still allows the suspension to move freely, clears the tires, and works with the roads and driving conditions you actually encounter.
Do I need adjustable camber arms or plates?
Not always. Mild lowering may remain within a useful adjustment range, but a significant drop can create extra negative camber or make toe difficult to correct. An alignment reading will show whether additional adjustment parts are necessary for your target settings.
Can I reuse the factory top mounts?
Only if the coilover instructions specifically allow it and the mounts are in good condition. Some kits are designed around factory rubber mounts, while others require supplied top hats, bearings, or camber plates. Mixing parts without confirmation can create incorrect preload, noise, or unsafe fitment.
How often should I recheck coilover hardware?
Inspect the installation after the first short drive, after the suspension has settled, and periodically afterward—especially after hard use or height adjustments. Look for loose collars, new contact marks, damaged threads, and changes in ride height, then follow the manufacturer’s maintenance guidance.
Finish the job with measured checks
Learning how to install coilovers integra owners can trust means treating setup and verification as part of the installation, not as cosmetic extras. Confirm the correct kit, support the car securely, preserve brake and sensor routing, torque the hardware, and set the ride height within the manufacturer’s limits.
After the cautious test, schedule a four-wheel alignment and keep the initial measurements and adjustment notes. If the car develops binding, severe pulling, tire contact, or a loose spring, stop driving and have the suspension inspected before returning to normal use.


