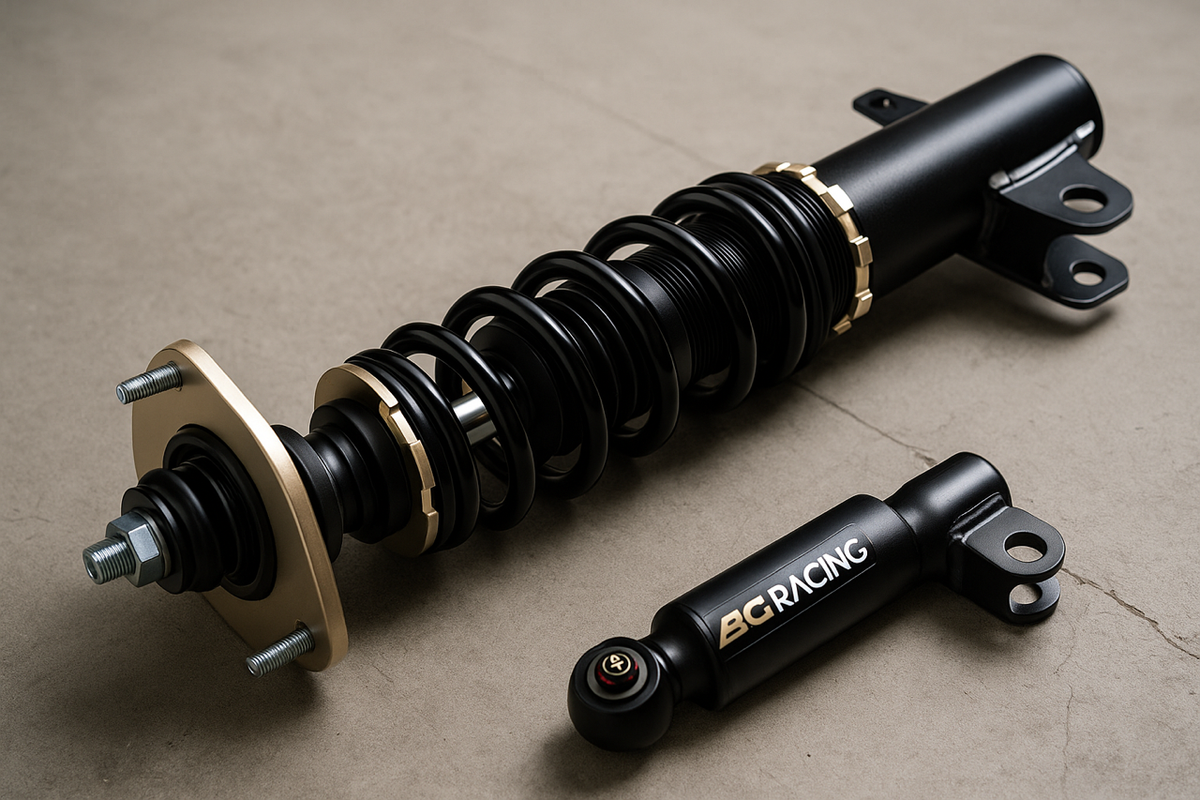
Coilovers can be hard to install for beginners, but an experienced home mechanic may be able to fit them with the right tools, vehicle-specific instructions, and safe working conditions.
Across the United States, drivers install coilovers on daily commuters, sports cars, and track cars to change ride height and suspension response. The job is often manageable for a skilled home mechanic, but it is not a simple bolt-on task for every vehicle. The work involves lifting the car, supporting its weight, removing suspension parts, and fitting components that affect steering and handling.
The difficulty depends on the car, the coilover design, the condition of the original hardware, and your repair skills. A complete kit designed for your exact vehicle may be easier to fit than a setup that needs extra parts or changes. Some cars also have tight working spaces, rusted fasteners, or suspension designs that require more steps than expected.
Before starting, check the kit instructions and your vehicle service manual. Make sure you have the correct tools, safe lifting equipment, and a suitable place to work. If you cannot safely support the car or confirm the required fastener torque, a professional installation is the better choice.
For most first-time DIY mechanics, installing coilovers is a moderate to difficult repair. The task requires more care than changing a wheel or replacing an air filter because suspension parts carry vehicle loads and affect how the car steers and stops. A person who has already done brake or suspension work may find the process easier.
The job is not equally hard on every car. Some vehicles use suspension layouts that provide fairly direct access to the struts and mounting points. Others have crowded engine bays, complex rear suspension systems, seized bolts, or parts that must be moved to gain access.
A complete coilover assembly can simplify the work when it replaces the original spring and damper as one unit. A kit that requires transferring factory mounts or other parts may add steps. Always check the exact kit design rather than assuming every coilover installs in the same way.
Source: YouTube > ChrisFix
Beginner with no repair experience
The job may be difficult because lifting the car, removing suspension hardware, and tightening fasteners correctly all require knowledge and care.
Home mechanic with basic experience
The work may be manageable if you can safely lift and support the vehicle, use a torque wrench, and follow a vehicle-specific service procedure.
Experienced mechanic
The task is often more straightforward, although rust, unusual suspension designs, and alignment requirements can still increase the workload.
What Makes the Job Difficult?
The hardest part is often removing the original suspension without damaging nearby parts. Factory bolts can seize from corrosion, and some fasteners are difficult to reach. A bolt that will not move with normal hand tools may need a proper removal method or professional equipment.
Spring handling is another concern. A coil spring can store substantial energy when compressed. If your installation requires transferring a spring or dismantling a strut, follow the specified procedure and use the correct spring compressor where required. Never improvise with tools that are not designed for this work.
Corroded hardware
Rust can make bolts difficult to remove and may require additional time, suitable penetrant, or professional tools.
Limited access
Tight spaces can make it harder to position tools, remove fasteners, and guide the new assembly into place.
Spring and mount transfers
Some kits require original parts to be moved onto the new assembly, which adds work and may require special equipment.
How Long Does Coilover Installation Take?
Installation time varies by vehicle, kit design, hardware condition, and mechanic experience. A straightforward job can take a few hours for someone familiar with the suspension, while a first-time installer may need much longer. Rusted fasteners or unexpected fitment problems can turn a planned afternoon into a longer repair.
Do not treat a time estimate as a promise. A shop may have vehicle lifts, impact tools, specialty equipment, and experience with a specific model. A home mechanic working on jack stands may need more time to set up the vehicle, check each step, and resolve problems safely.
Allow extra time for inspection and alignment. Finishing the mechanical installation does not mean the vehicle is ready for normal driving. The suspension must be checked, fasteners tightened to the correct specifications, and wheel alignment assessed.
Source: YouTube > milanmastracci
Preparation
Identify the correct kit, read the instructions, check the tools, and confirm the required torque values before lifting the vehicle.
Removal and fitting
Time depends on the suspension layout, the number of parts that must be moved, and whether any fasteners are seized.
Checks and alignment
Budget additional time to inspect the work, verify clearances, and arrange a professional alignment.
Why First-Time Installers Often Need More Time
A beginner must learn the order of removal, identify the correct mounting points, and confirm how the new parts fit. Rushing to match a professional mechanic’s time can lead to damaged threads, missing hardware, or loose fasteners.
Photographs taken during disassembly can help you remember the location of brackets and clips. Keep parts organized by corner of the car, and stop if a component does not fit as the manufacturer describes. Do not force a part into place simply to finish sooner.
Plan for interruptions
Leave time to find a missing tool, obtain replacement hardware, or consult the service manual.
Avoid a rushed finish
Do not drive until the installation, torque checks, and required alignment work are complete.
Tools Needed to Install Coilovers
The correct tools make coilover installation safer and easier. The exact list depends on your vehicle and kit, so use the service manual and installation guide as the final reference. Do not begin until you know how the vehicle must be lifted and which fasteners need special tools.
A level, firm work surface is essential. Use a suitable floor jack and correctly rated jack stands at the vehicle’s approved support points. Wheel chocks help prevent movement, but they do not replace jack stands. Never crawl under a vehicle that is supported only by a hydraulic jack.
A torque wrench is needed for fasteners with specified torque values. Guessing by feel is not a reliable substitute, particularly for suspension mounting bolts. Some vehicles also require new self-locking nuts, one-time-use fasteners, or special alignment procedures.
Source: coilovers.com
Floor jack and jack stands
Use equipment rated for the vehicle and place it only at the approved lifting and support points.
Socket and wrench set
Choose the correct sizes for suspension fasteners and avoid tools that damage bolt heads or nuts.
Torque wrench
Tighten each fastener to the specification provided by the vehicle or coilover manufacturer.
Wheel chocks
Secure the wheels that remain on the ground before lifting the vehicle.
Penetrating fluid and a suitable breaker bar
These may help with stubborn fasteners when used correctly, but do not apply excessive force that could damage a bolt or mounting point.
Vehicle-specific service information
Use it to identify safe lifting points, the correct removal sequence, torque values, and any special procedures.
Do You Need an Impact Wrench?
An impact wrench can help remove certain stubborn fasteners, but it is not required for every installation. It should not be used indiscriminately on sensitive parts or as a replacement for a torque wrench during final tightening.
Some suspension jobs need a pass-through socket, a special strut tool, or equipment to separate a joint without damage. If the procedure requires a tool you do not have, obtain the right tool or have a qualified shop complete that part of the work.
Use tools for their intended purpose
Do not use an impact tool to force a misaligned bolt or tighten a fastener beyond its specified torque.
Check special tool needs early
Review the complete installation instructions before you take the vehicle apart.
What Affects Coilover Installation Difficulty?
The vehicle and the kit have the biggest effect on installation difficulty. Two cars that look similar may use different suspension layouts, mounting hardware, or electronic controls. Even two coilover kits for the same car can have different installation requirements.
The best way to judge difficulty is to check the instructions for the exact make, model, year, and suspension package. Confirm whether the kit includes complete assemblies, requires original top mounts, or needs additional parts. Also check whether the car has adaptive dampers or other factory suspension features that affect compatibility.
The condition of the car matters just as much as its design. A newer vehicle with clean hardware may come apart with little trouble, while an older car exposed to road salt can have severely corroded fasteners. Damaged threads, worn mounts, or bent suspension parts should be addressed before the new kit goes in.
Source: YouTube
Suspension layout
Strut-based front suspension and multi-link rear suspension can involve different removal steps and access requirements.
Complete assemblies versus separate parts
A complete assembly may reduce the need to transfer factory components, while other designs need additional preparation.
Vehicle age and corrosion
Seized bolts and damaged hardware can add time and may require professional removal methods.
Electronic suspension systems
Cars with adaptive dampers or electronic controls may need compatible parts, special procedures, or additional equipment.
Ride-height changes
A large change in ride height can affect alignment, suspension travel, and clearance around wheels and body parts.
Why the Exact Coilover Kit Matters
A coilover kit is not automatically compatible with every trim or model year listed in a broad product category. Brake packages, factory suspension options, body styles, and other changes can affect fitment.
Check the manufacturer’s fitment list and installation notes before buying. Confirm the included mounts, adjustment hardware, spring specifications, and any stated limitations. If the seller or manufacturer cannot confirm fitment for your exact vehicle, resolve that question before installation.
Confirm the vehicle details
Match the make, model, year, trim, drivetrain, and relevant factory suspension options.
Inspect the package
Check that all required components and hardware are present and undamaged before disassembly.
Read adjustment limits
Use only the permitted ride-height and damping settings specified for the kit.
Can You Install Coilovers Yourself?
You may be able to install coilovers at home if you have sound mechanical skills, the right tools, a safe workspace, and complete instructions for your vehicle. Prior experience with suspension or brake work can help because you will already understand basic fastener removal, torque procedures, and safe vehicle support.
However, being able to change a tire does not mean you are ready to remove suspension components. Some tasks involve spring tension, loaded suspension joints, and fasteners that are critical to vehicle control. If you do not understand the procedure or cannot safely support the car, stop and seek professional help.
A sensible choice depends on more than the money you might save. Consider the cost of tools, your available time, the risk of damaging parts, and the need for alignment afterward. A professional installation can be better value if you would need to buy several tools for one job.
Source: YouTube > Smeedia
DIY may be reasonable
You understand safe lifting, can follow a service manual, have the required tools, and can verify every installation step.
Get professional help
You lack suitable lifting equipment, face severe corrosion, need a special spring tool, or cannot confirm the correct assembly and torque procedure.
Consider a hybrid approach
A qualified shop may be able to handle difficult assembly work or the full installation while you arrange the alignment and final inspection.
Questions to Ask Before Starting
Before lifting the car, make sure you can answer a few basic questions. Do you have the right kit for your exact vehicle? Do you know the approved support points and required torque values? Can you safely complete the job if a fastener is seized or a part does not fit?
If any answer is no, resolve the issue first. The suspension is a safety-critical system, so stopping to obtain the right information is better than improvising during installation.
Review the full procedure
Read the instructions from start to finish, including any requirements for spring compression, wiring, or electronic controls.
Prepare a safe workspace
Use a firm, level surface with enough room to open doors, handle tools, and move around the vehicle.
Plan the final inspection
Know how you will verify torque, check clearances, and arrange wheel alignment before driving normally.
Basic Coilover Installation Process
The installation process starts with vehicle-specific preparation and ends with inspection and alignment. The steps below describe the general sequence, not a complete repair procedure for every car. Always follow the instructions supplied with your kit and the service information for your vehicle.
Suspension designs vary, so some vehicles require additional steps for brake hoses, wheel-speed sensor wires, sway bar links, or electronic damper connections. Do not disconnect or move a component unless the procedure calls for it and you know how to restore it correctly.
Source: YouTube
Step 1: Verify compatibility
Confirm that the kit matches the vehicle and that all required parts, instructions, and tools are available.
Step 2: Prepare the vehicle
Park on firm, level ground, secure the wheels, and lift and support the vehicle at the approved points.
Step 3: Remove the original suspension parts
Follow the vehicle-specific sequence and protect nearby brake, steering, and electrical components.
Step 4: Install the coilovers
Position the assemblies correctly, fit the required hardware, and avoid forcing misaligned mounts or fasteners.
Step 5: Tighten and inspect
Use the specified torque values and replace one-time-use fasteners where required.
Step 6: Check settings and arrange alignment
Set the ride height and damping according to the kit instructions, check clearances, and arrange a professional alignment.
Prepare Before Removing Anything
Take clear photographs of the original assembly, routing of wires, and locations of brackets. Keep fasteners organized so that you can identify where each item belongs. Compare the new components with the original parts before installation.
If the vehicle has an electronic suspension system, consult the appropriate service procedure before unplugging connectors or removing dampers. Some systems need compatible replacement parts or electronic adjustments after the work is complete.
Check for missing parts
Do not disassemble the vehicle if required hardware, mounts, or installation instructions are missing.
Record the original setup
Photographs can help with bracket placement and wire routing, but they do not replace service instructions.
Fit the New Assemblies Correctly
Make sure each coilover is installed in the correct location and orientation. Some kits have distinct left and right parts or specific adjustment positions. Use the supplied instructions to identify mounting points and permitted settings.
Never force a bolt through misaligned holes. A bolt that will not enter correctly may indicate that the suspension is not positioned as intended or that a component is incompatible. Correct the cause before tightening anything.
Follow the specified sequence
Install mounts, brackets, and other hardware in the order stated by the vehicle or kit manufacturer.
Protect nearby components
Make sure brake hoses and sensor wires are routed correctly and are not stretched, pinched, or rubbing.
Complete the Final Safety Checks
After installation, verify that all required fasteners are present and tightened to specification. Confirm that adjustment collars and locking hardware are secured as directed by the manufacturer. Check that the suspension moves as intended and that nothing interferes with the tires, brakes, or steering.
Lower the car according to the approved procedure and arrange a wheel alignment. If the instructions require rechecking fasteners after a stated period or driving distance, follow that schedule. Do not invent a universal retightening interval because requirements differ by kit and vehicle.
Check clearances
Verify that the tires, wheels, brake lines, sensor wires, and suspension parts have the required clearance throughout their permitted movement.
Confirm alignment
Have the alignment checked and adjusted to appropriate specifications for the vehicle and intended use.
Stop if anything seems wrong
Unusual movement, loose hardware, binding, or contact between components requires inspection before the vehicle is driven.
Common Coilover Installation Mistakes
Most avoidable installation problems come from incorrect fitment, poor preparation, improper tightening, or skipped checks. A part can appear to fit while still being installed incorrectly. Careful inspection matters because suspension faults can affect vehicle stability and tire wear.
Follow the exact torque specifications and assembly sequence. Do not rely on generic values from another vehicle or on the feel of a wrench. If a bolt, mount, or adjustment collar looks damaged, resolve the problem before using the car.
Source: YouTube > Krebsbach Racing
Using the wrong kit
A mismatch in model year, trim, drivetrain, or suspension type can create fitment and safety problems.
Working with unsafe supports
A jack alone is not a safe support for working under a vehicle. Use correctly placed, suitably rated jack stands.
Guessing torque values
Incorrect tightening can damage threads, loosen hardware, or affect the clamping force of a joint.
Forcing parts into place
Resistance may indicate misalignment, incompatible parts, or a problem with the installation sequence.
Ignoring brake and sensor wiring
Incorrect routing can cause rubbing, stretching, or damage as the suspension moves.
Skipping alignment
Changing ride height can change wheel alignment and lead to poor handling or uneven tire wear.
Why Lowering the Car Too Much Can Cause Problems
Setting the car very low can reduce available suspension travel and increase the chance of the chassis or suspension hitting road surfaces. It can also affect alignment, tire clearance, and the relationship between suspension parts and steering components.
Use the adjustment range approved by the coilover manufacturer. A lower setting is not automatically better, and the vehicle must retain adequate clearance and safe suspension movement. If the kit cannot provide the intended height without binding or contact, consult the manufacturer rather than forcing the setup.
Stay within the permitted range
Do not adjust the coilovers beyond the manufacturer’s stated limits.
Inspect wheel and tire clearance
Check for contact at the steering positions and suspension positions specified by the service procedure.
Recheck the alignment
Have alignment measured after ride-height changes and correct any values outside the intended specifications.
Are Coilovers Harder to Install Than Lowering Springs?
Coilovers are not always harder to install than lowering springs. The answer depends on whether the coilover kit arrives as a complete assembly and how much of the original suspension must be reused. A complete coilover unit may replace the original spring and damper without requiring the installer to transfer the factory spring.
Lowering springs usually replace the factory springs while keeping the original dampers, if those dampers are compatible and in suitable condition. That process often requires removing the original strut assembly and safely compressing the spring before separating it from the damper. The spring compression step adds risk and may require specialized equipment.
Coilovers can also require extra work for ride-height adjustment, damping settings, locking collars, and alignment checks. Some designs need factory mounts or other components transferred, so the work can be similar to or more involved than a spring replacement. Compare the actual installation procedures rather than assuming one option is always easier.
Source: YouTube > Seb’s Garage
Complete coilover assemblies
These may reduce the need to dismantle the original spring and damper assembly, depending on the kit.
Lowering springs
These generally require safe removal and compression of the factory springs, along with inspection of the original dampers.
Coilovers with transferable parts
These may require extra steps to reuse original mounts or hardware, so installation difficulty depends on the exact design.
Which Option Is Easier for a Beginner?
Neither option is automatically suitable for a beginner. A complete coilover assembly may avoid some spring-transfer work, but removing suspension components and tightening critical fasteners still requires skill and safe equipment. Lowering springs can look simple on paper while requiring careful handling of a compressed factory spring.
If your main goal is to change ride height without doing suspension work yourself, compare the full installed cost of each option. Include the kit, labor, alignment, and any needed replacement mounts or dampers. A qualified shop can explain which setup fits your vehicle and intended use.
Choose by installation requirements
Read the vehicle-specific procedure and confirm whether spring compression or special tools are required.
Consider the whole suspension
Check the condition of existing dampers, mounts, and related parts before choosing replacement springs or coilovers.
How Much Does Professional Coilover Installation Cost?
The cost of professional installation depends on local labor rates, vehicle design, kit complexity, and the condition of the original hardware. There is no single price that applies to every car in the United States. A shop may charge more for a complex suspension layout or a vehicle with heavily corroded fasteners.
Ask for an estimate that separates labor, alignment, and any additional parts. Clarify whether the quoted labor includes setting the ride height, checking clearances, and handling any electronic suspension requirements. If the shop finds damaged mounts or seized hardware, ask for approval before extra work begins.
DIY installation is not automatically cheaper. You may need to buy a torque wrench, lifting equipment, sockets, or special tools. Incorrect assembly can also lead to repair costs, tire damage, or another shop visit, so include those risks when comparing the options.
Source: YouTube > milanmastracci
Labor
Ask whether the estimate covers all four corners, required hardware transfers, and any special steps for your vehicle.
Wheel alignment
Confirm whether alignment is included or billed separately after installation.
Extra parts
Ask about replacement mounts, fasteners, or other components if the original parts are worn or damaged.
Tools and workspace
Include any equipment you must buy or rent if you plan to do the work yourself.
How to Compare Shop Estimates
Get estimates from shops familiar with your vehicle and the coilover brand you plan to use. Provide the exact kit details and explain whether the car has factory electronic dampers or other special features. This helps the shop quote the actual job rather than a generic suspension replacement.
A low quote may exclude alignment, seized hardware, or adjustments after the initial fitment. Compare the scope of work and ask how the shop handles installation problems. The most useful estimate is one that clearly states what is included and what may cost extra.
Request an itemized quote
Separate installation labor, alignment, hardware, and any required electronic work.
Confirm relevant experience
Ask whether the shop has installed the same type of kit on your vehicle or a closely related model.
Signs the Installation Needs More Work
Do not assume the job is complete just because all four coilovers are attached. A problem may become clear during the final inspection, when checking wheel clearance, or when the alignment is measured. Any sign of loose hardware, interference, or incorrect fitment needs attention before normal driving.
If the car sits unevenly, first check whether the measurements were taken on level ground and whether the ride-height settings match the manufacturer’s instructions. Uneven height can also result from incorrect assembly, suspension binding, or differences in the way the vehicle is loaded. Do not use adjustment collars to hide an underlying installation problem.
Noise, pulling, steering changes, or tire contact can have several causes. Stop using the vehicle if you suspect a loose suspension part, a damaged brake hose, or a component interfering with a wheel. Have the installation inspected by a qualified mechanic before driving again.
Source: YouTube > ChrisFix
Uneven ride height
Check the measurement method, adjustment settings, correct part placement, and whether the suspension moves freely.
Clunks or unusual noises
Possible causes include loose hardware, incorrect assembly, or contact between components; an inspection is needed.
Steering pull or an off-center wheel
Have the alignment checked and inspect for incorrect installation or damaged suspension parts.
Tire or brake-line contact
Do not drive until the interference is corrected and all related components are checked.
Persistent instability
Stop driving and have a qualified mechanic assess the suspension, tires, alignment, and installation.
What If a Bolt Will Not Tighten Correctly?
Stop if a fastener spins without tightening, the threads appear damaged, or the specified torque cannot be reached normally. Do not keep turning the bolt or substitute a random fastener. The correct repair may require a replacement bolt, nut, or professional thread repair.
If the cause is unclear, consult the vehicle service manual or a qualified technician. Suspension mounting points are safety-critical, and an improvised repair can cause the joint to fail.
Stop and inspect
Check for incorrect hardware, cross-threading, damaged threads, or a mounting part that is not seated properly.
Use approved replacement parts
Follow the vehicle or kit manufacturer’s requirements for fastener type and reuse.
Research Notes and Next-Question Gap Map
This guide addresses the main decision behind the question: whether coilover installation is suitable for a home mechanic. It combines general suspension principles with a practical decision process. It does not claim that a particular vehicle was tested or that every installation follows the same sequence.
The key limitation is that installation difficulty cannot be confirmed for an unspecified vehicle and kit. A vehicle-specific service manual and the exact coilover manufacturer’s instructions are the primary references for fitment, torque values, special tools, and adjustment limits. Those documents should be checked before work begins.
The following gap map identifies useful follow-up needs inferred from the main task. These are editorial inferences, not verified search-volume findings or confirmed questions from a live search results page. No competitor coverage is marked as checked because a current competitor-page review was not completed for this article.
Observed research limitation
No current competitor URLs, search result positions, or live People Also Ask results were verified for this draft.
Primary evidence needed for a specific car
The vehicle service manual, the exact kit instructions, and any relevant manufacturer fitment or technical notices.
Practical improvement
The guide separates general guidance from vehicle-specific requirements and explains when the work should stop for safety.
Priority Follow-Up Questions
The next useful step is to identify the exact vehicle and kit. That information can turn broad guidance into a more accurate estimate of difficulty, likely special tools, and the procedures that need extra care.
Question: How long will the installation take on my car?
Stage: Before starting. Basis: Inferred next need. Competitor coverage: Not checked. Benefit: Supports a realistic schedule. Evidence needed: Vehicle-specific service information and kit instructions. Priority: High. Placement: Installation time section.
Question: Which tools are required for my vehicle?
Stage: Preparation. Basis: Inferred next need. Competitor coverage: Not checked. Benefit: Prevents an incomplete job and unsafe improvisation. Evidence needed: Service manual and kit instructions. Priority: High. Placement: Tools section.
Question: Do coilovers require an alignment?
Stage: After installation. Basis: Inferred next need. Competitor coverage: Not checked. Benefit: Helps the reader plan the final step. Evidence needed: Vehicle alignment specifications and inspection results. Priority: High. Placement: Final checks section.
Question: Should I install coilovers or lowering springs?
Stage: Choosing a suspension setup. Basis: Inferred next need. Competitor coverage: Not checked. Benefit: Clarifies differences in installation and required equipment. Evidence needed: The procedures for the actual kit designs. Priority: Medium. Placement: Comparison section.
Question: What should I do if the hardware is seized?
Stage: During installation. Basis: Inferred next need. Competitor coverage: Not checked. Benefit: Reduces the chance of damaged fasteners and unsafe repairs. Evidence needed: Vehicle-specific removal guidance and qualified mechanical inspection where needed. Priority: High. Placement: Difficulty and troubleshooting sections.
Frequently Asked Questions
Q
Are coilovers hard to install for beginners?
Yes, they can be difficult for beginners because the job involves lifting and supporting the vehicle, removing suspension parts, and tightening safety-critical fasteners correctly. A complete kit may simplify some steps, but it does not remove the need for mechanical skill and proper tools. If you have never worked on suspension systems, professional installation is often the safer option.
Q
Can I install coilovers in my driveway?
A driveway may work if it has a firm, level surface, enough space, and suitable lifting and support equipment. Do not work under a vehicle supported only by a jack, and do not attempt spring work without the correct tools and procedure. If the surface is sloped, soft, or uneven, use a suitable professional workspace instead.
Q
Do coilovers need an alignment after installation?
A wheel alignment should generally be checked after coilover installation because removing suspension parts or changing ride height can alter alignment angles. A professional should measure the relevant angles and adjust them to suitable specifications for the vehicle. Do not assume the alignment remains correct simply because the steering wheel looks straight.
Q
Can I drive immediately after installing coilovers?
Do not drive normally until the installation has been checked, all required fasteners have been tightened to specification, and the relevant clearances have been confirmed. Arrange the required wheel alignment and follow the kit manufacturer’s instructions about initial use and reinspection. If you notice unusual noises, steering changes, contact, or instability, stop and have the vehicle inspected.
Q
Are coilovers easier to install than lowering springs?
It depends on the kit and vehicle. Complete coilover assemblies may avoid transferring the factory spring, while lowering springs usually require safe spring compression and reuse of compatible dampers. Some coilover kits also require mount transfers or extra adjustments, so compare the exact installation instructions before deciding which job is easier.
Q
How much does it cost to have coilovers installed?
The price varies by vehicle, local labor rates, kit design, and hardware condition. Ask a shop for an itemized quote covering installation, alignment, and any required extra parts. Compare the total cost with the tools and time you would need for a DIY installation rather than looking at labor alone.
✦ Wrapping Up
Conclusion
Coilovers can be hard to install, but the job is manageable for a home mechanic with suitable experience, the right equipment, and vehicle-specific instructions. The main challenges are removing the original suspension safely, dealing with difficult hardware, fitting the new assemblies correctly, and completing the required checks.
For a beginner, the most important decision is whether the job can be done safely with the tools and knowledge available. Do not rush, guess torque values, or improvise when a spring or fastener presents a problem. A qualified shop is the better option when the procedure, fitment, or safe support of the vehicle is uncertain.
Before buying a kit or beginning work, verify compatibility with your exact vehicle, review the complete installation procedure, and plan for wheel alignment. These steps help you avoid preventable delays and reduce the chance of suspension problems after installation.
💡 Key Takeaway
Check the fitment and instructions for your exact vehicle and coilover kit first. If you cannot safely lift and support the car, use the required tools, and verify the final assembly, arrange professional installation and wheel alignment.
Eric
Hi, I’m Eric Bennett, the person behind OffRoadTruckAccessories.com.
I created this blog to share my interest in trucks, off-road driving, automotive accessories, and DIY modifications. I enjoy learning how different truck accessories work, testing their usefulness, and understanding whether they are truly worth buying.
Will G37 coilovers fit G35? Learn which model years may share fitment, what changes with coupe, sedan, and AWD setups, and how to verify compatibility.