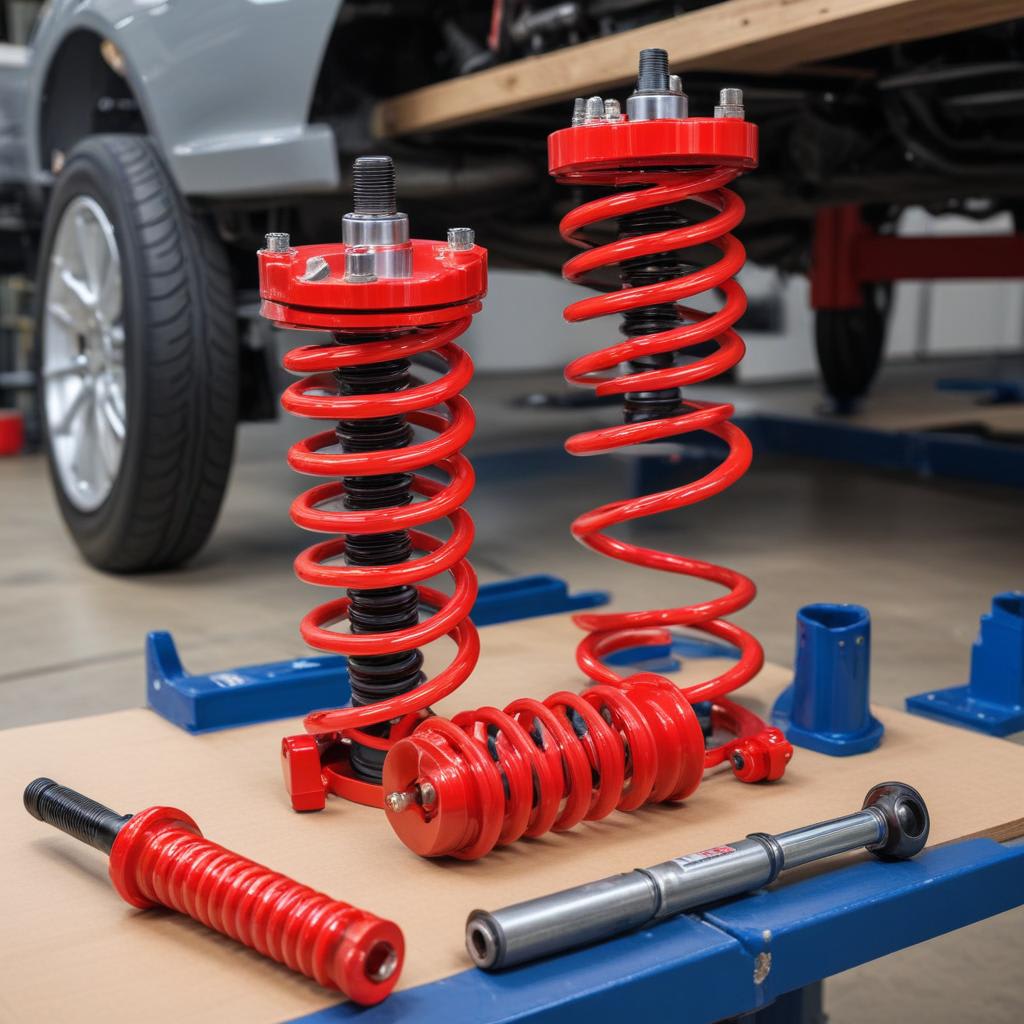
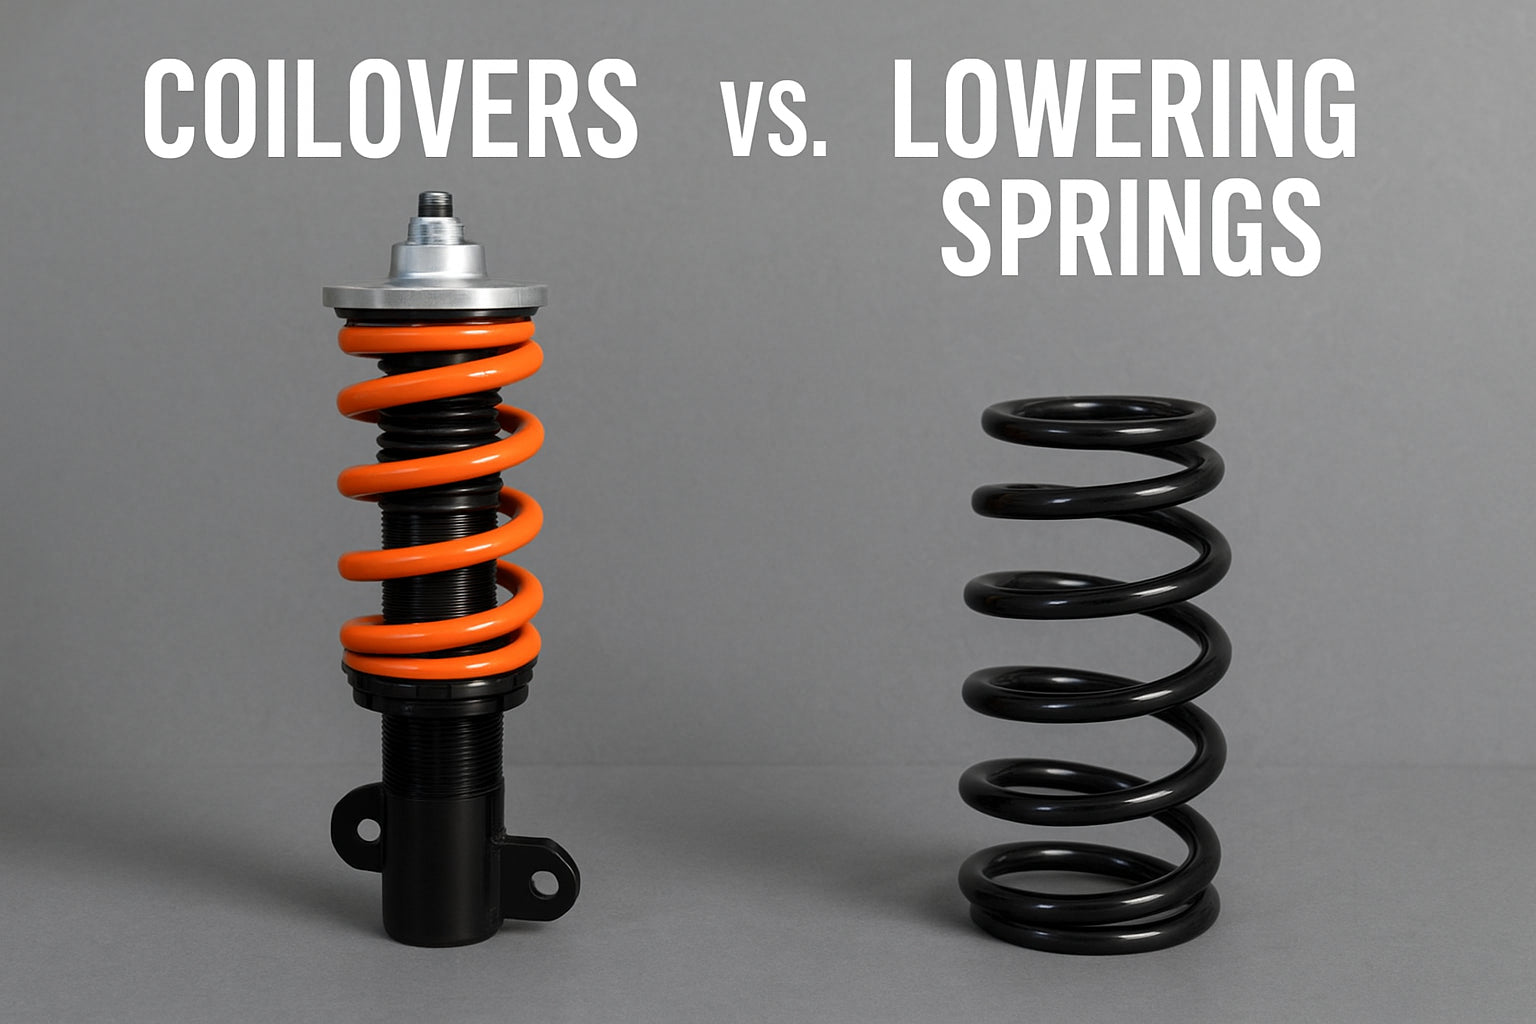
Coilovers are often easier to install than lowering springs because many kits replace the full spring and damper assembly. However, the result depends on your car, the kit, and your tools.
For drivers in the United States, changing a car’s suspension can mean a lower stance, a firmer ride, or better control on the road or track. Two common choices are lowering springs and coilovers. Both can change ride height, but the work needed to fit them can differ a great deal.
A complete coilover kit often replaces more of the original suspension assembly at once. Lowering springs usually require you to remove the original spring and fit a new one to the existing strut or shock. That step may require a suitable spring compressor, careful handling, and extra labor.
Neither option is always easier. Some coilover kits fit with basic bolt-on steps, while others need extra setup or changes to related parts. Some cars also have complex rear suspension layouts. This guide compares the work, tools, risks, cost, and final checks so you can make a sound choice.
Are Coilovers Easier to Install Than Lowering Springs?
In many common setups, complete coilovers are easier to install than lowering springs because the new spring and damper arrive as a matched unit. The installer can remove the original assembly and fit the replacement without taking the old spring off the original strut. This can reduce the number of steps and the need to handle a compressed spring.
Lowering springs may involve more bench work. The original strut assembly must often be removed, the spring must be safely compressed, and the original spring must be taken off before the replacement can be fitted. The strut is then assembled and installed again.
That does not mean coilovers are always faster. Some kits need height adjustment, preload checks, extra brackets, or careful setup at all four corners. A spring-only kit may be straightforward on a car with simple suspension access, especially for a shop that knows the vehicle well.
Source: slrspeed.com
Complete coilovers
Often reduce assembly work because the replacement spring and damper come together, although setup and fitment checks remain necessary.
Lowering springs
Usually reuse the original dampers, so the installer must remove the original springs and fit the new ones safely.
The deciding factor
The exact car and suspension design matter more than the name of the upgrade alone.
What Counts as a Complete Coilover Kit?
A typical complete coilover assembly combines a coil spring with a damper and often includes a threaded body or perch for ride-height adjustment. Some kits also include top mounts, while others reuse the original mounts. Check the parts list before assuming the kit contains every component needed.
Check the contents
Confirm whether top mounts, locking collars, adjustment tools, and required hardware are included.
Check fitment
Match the kit to the exact year, make, model, trim, and suspension configuration.
How Coilover Installation Differs From Spring Installation
Both jobs start with lifting the car safely, removing the wheels, and gaining access to the suspension. The main difference comes when the original strut or shock assembly is removed. A complete coilover may be ready for direct installation, while a lowering spring usually needs to be fitted to the original damper assembly.
Actual steps vary by vehicle. Some cars use a strut that locates the steering knuckle, while others use separate springs and shocks. Rear suspension may have limited access, and certain models need trim panels or other parts removed to reach the upper mounts.
The outline below shows the typical work involved. It is not a substitute for the vehicle service manual, which provides the correct lifting points, fastener procedures, torque values, and model-specific safety steps.
Source: slrspeed.com
Step 1: Verify the parts
Check the application, kit contents, installation instructions, and any required replacement hardware before lifting the vehicle.
Step 2: Lift and support the car
Use approved lifting points, a suitable jack, and correctly rated jack stands on firm, level ground. Never rely on a jack alone.
Step 3: Remove the original assembly
Follow the service manual to disconnect the required links, brackets, and fasteners without damaging brake hoses, wiring, or other parts.
Step 4: Fit the replacement
Install the complete coilover or safely replace the original spring with the lowering spring, following the kit and vehicle instructions.
Step 5: Tighten and inspect
Use the specified torque values and check clearances, hose routing, mounts, and fastener security before the car is lowered.
Step 6: Set up and align
Set ride height as directed, settle the suspension as required, and arrange a wheel alignment before normal driving.
Why Spring Replacement Can Take More Work
A coil spring stores substantial energy even when the car is raised. On many strut designs, a proper spring compressor is needed to control the spring while the mount is removed. The tool must fit the spring and be used as its maker directs.
A spring that is not held securely can move with great force. Do not loosen a strut’s center shaft nut until the spring is safely restrained and the service procedure allows it. If the correct equipment or experience is missing, have a qualified technician perform this step.
More parts to handle
The spring, mount, isolators, bump stop, and dust boot may need inspection and careful transfer.
Damper condition matters
Worn or leaking original dampers may not work well with the new springs and may need replacement.
Why Coilovers Can Still Be Complex
A coilover kit may need its ride height set before installation or adjusted afterward. The installer must also confirm that the locking collars are secure and that the suspension has enough travel. A threaded adjustment system does not remove the need for correct alignment or proper damper setup.
Setup time
Height, preload, and damping settings can add work when the kit provides these adjustments.
Mount and bracket fit
Some designs reuse factory mounts or require particular brackets, links, or hardware.
Tools and Skills Needed for Each Upgrade
The right tools can make either job more manageable, but safe lifting equipment and correct torque tools are essential for both. Coilovers may avoid spring transfer work when supplied as complete assemblies. Lowering springs often require more specialized equipment because the original springs must be removed from their seats.
The exact tool list depends on the car. Some suspension fasteners need specific sockets or counter-hold tools, and rusted hardware can add time. Always use the service manual and the instructions supplied with the parts rather than relying on a generic tool list.
Source: storage.googleapis.com
Common tools for both jobs
A suitable floor jack, rated jack stands, wheel chocks, socket and wrench sets, a torque wrench, and the correct vehicle service information.
Tools often needed for lowering springs
A compatible spring compressor, tools for the strut shaft and top mount, and any specified replacement nuts or bolts.
Tools often needed for coilovers
The kit’s adjustment spanner or other supplied tools, plus the tools required to remove and install the original suspension.
Useful inspection items
A work light and a way to inspect brake hoses, wiring, bushings, mounts, and tire clearance.
Can a Beginner Install Coilovers at Home?
A beginner with suitable tools, a safe workspace, and the exact service instructions may be able to complete some bolt-on coilover installations. However, suspension work affects steering, tire contact, and vehicle stability. Being able to remove a few bolts does not mean the finished installation is safe.
If the job involves seized fasteners, uncertain lifting points, electronic suspension systems, or steps you cannot verify, stop and seek help from a qualified mechanic. Do not improvise with unsafe supports or tools.
A reasonable DIY starting point
Read the full instructions, identify every fastener and connection, and confirm that you have the right tools before starting.
When to use a shop
Choose professional help if spring compression, damaged hardware, complex suspension parts, or safe torque procedures are beyond your skills.
Which Option Takes Less Time?
Complete coilovers may take less installation time when they replace the original assemblies directly and arrive ready for fitment. Lowering springs can take longer because the original spring must be removed and the replacement fitted to the original damper. Still, no single time estimate applies to every car or kit.
A mechanic familiar with a specific vehicle may fit lowering springs efficiently, while a first-time installer may spend longer setting up coilovers. Rust, tight access, broken fasteners, electronic controls, and extra alignment work can change the total time for either option.
For a useful comparison, ask a shop for labor estimates for your exact vehicle and the exact parts. Confirm whether the quote includes front and rear installation, ride-height setup, replacement hardware, and alignment. Do not compare a coilover quote that includes alignment with a spring quote that does not.
Source: racecompengineering.com
Vehicle layout
A simple suspension design may be easier to service than one with restricted access or separate spring and damper arrangements.
Condition of the car
Rust, corrosion, worn mounts, and damaged fasteners can slow down either installation.
Kit preparation
Parts that arrive complete and correctly configured can reduce workshop time, while missing or incompatible parts cause delays.
Installer experience
Familiarity with the vehicle and the kit can affect labor time as much as the type of suspension upgrade.
Compare the Full Job, Not Just Removal Time
Installation is only one part of the work. Coilovers may need ride-height balancing and damping setup, while lowering springs may need additional checks because the original dampers remain in service. Both options need inspection and alignment as appropriate.
Ask for the complete job time rather than the time needed to swap one component. A quote should account for safe installation, final tightening, any specified settling procedure, and the alignment needed for the modified ride height.
Before work begins
Ask whether the estimate includes all four corners, required hardware, and any expected work on related parts.
After installation
Confirm who will check alignment, inspect clearances, and verify the final ride height.
Cost: Coilovers Versus Lowering Springs
Lowering springs often cost less to buy because they replace the springs rather than supplying a full set of adjustable suspension units. Coilovers often cost more because they include dampers and may provide ride-height or damping adjustments. The exact difference depends on the car, kit quality, included parts, and local labor rates.
The lower purchase price does not always mean the lower installed cost. Spring installation can involve labor to compress and transfer the springs, and worn original dampers may need replacement. Coilovers may need extra setup or new mounts, and some kits require additional components for the intended fit.
For an accurate comparison, add the parts price, labor, alignment, required hardware, and likely maintenance or repair needs. If you plan to keep the car for years, also consider replacement damper costs and the availability of service parts.
Source: slrspeed.com
Lowering spring costs
Usually include the springs and installation labor, with possible added costs for dampers, mounts, or worn hardware.
Coilover costs
Usually include the complete kit and labor, with possible added costs for alignment, setup, mounts, or other fitment parts.
Shared costs
Both upgrades may require alignment and replacement of worn or damaged components found during installation.
A Simple Way to Compare Quotes
Use the same cost categories for both options. This prevents a low parts price from hiding extra labor or a quote from leaving out the final alignment.
Parts
Record the price of the exact kit, including any mounts or hardware that must be purchased separately.
Labor
Request a quote for the full job on your exact car, including any setup work.
Alignment
Include the required alignment and ask whether the shop can meet the vehicle’s alignment specifications.
Future upkeep
Consider the cost of damper replacement, service parts, and any maintenance stated by the kit maker.
Ride Quality and Handling Matter Too
Installation ease should not be the only reason to choose a suspension upgrade. Lowering springs mainly change spring rate and ride height while retaining the original dampers in most applications. Coilovers combine a spring and damper designed to work together, and some kits allow the driver to adjust ride height or damping.
Neither type guarantees a better ride or more grip. A very low ride height can reduce suspension travel, and a poorly matched spring and damper can make a car feel harsh or unsettled. A well-chosen spring kit can work well for street use, while a suitable coilover kit can offer more control over setup.
For daily driving, consider road quality, ground clearance, comfort, tire wear, and the condition of the original dampers. For track use, review the kit’s intended purpose, available adjustment, and setup guidance rather than assuming that a higher price means better performance.
Source: suspensionlist.com
Choose lowering springs when
You want a modest ride-height change, a simpler setup, and a kit designed to work with your existing dampers.
Choose coilovers when
You need a matched spring and damper package or useful adjustment options for a defined street or track goal.
Think about comfort
Check spring rates, damper design, available travel, and the manufacturer’s intended use before buying.
Do Lowering Springs Damage Stock Shocks?
Lowering springs do not automatically damage original shocks, but compatibility matters. Some springs are designed to work with stock dampers, while others may place more demand on dampers that were not built for the new spring rate or ride height.
If the dampers already leak, bounce excessively, or show other signs of wear, fitting new springs alone may leave the car with poor control. Check the spring maker’s guidance and inspect the original dampers before choosing this route.
Check compatibility
Use springs approved for your vehicle and the intended damper setup.
Inspect worn parts
Replace faulty dampers or mounts as needed rather than expecting new springs to fix them.
Safety Checks After Installation
A suspension installation is complete only when the parts are secure, the car sits as intended, and the wheels remain aligned within suitable specifications. Incorrect assembly or loose fasteners can affect steering and handling. Follow the vehicle service manual and the suspension maker’s instructions for every check.
Do not drive normally if a spring is not seated correctly, a mount is loose, a brake hose is stretched, or a tire rubs against the body or suspension. If anything looks wrong or the car handles differently in an unsafe way, stop in a safe place and arrange an inspection.
Source: coiloverdepot.com
Verify fasteners
Use the correct torque specifications and replacement fasteners where the service manual requires them.
Inspect hose and wire clearance
Check that brake hoses, ABS wiring, and other connections are routed correctly through the full range of steering and suspension movement.
Check tire clearance
Look for contact with the body, wheel liner, spring, or other suspension parts at suitable steering positions.
Get a wheel alignment
Arrange alignment after the ride height changes and confirm that the shop can set the required angles.
Listen and recheck
Pay attention to new clunks, rubbing, or unusual handling, and follow the kit maker’s guidance on post-installation checks.
Why Alignment Is Essential
Changing ride height can alter camber, toe, and other wheel alignment angles. Incorrect alignment may cause the car to pull, feel unstable, or wear tires unevenly. An alignment check helps confirm that the suspension change has not left the wheels outside the intended range.
Some vehicles have limited factory adjustment, and a lowered setup may need additional parts to reach the desired alignment. A qualified alignment shop can explain what is possible for the exact vehicle and whether the setup remains suitable for road use.
Before normal driving
Confirm that the installation is secure and the steering and brakes work as intended.
At the alignment shop
Tell the technician what suspension parts were installed and provide the kit’s ride-height or setup information.
Common Installation Mistakes to Avoid
Most avoidable problems begin with the wrong parts, unsafe spring handling, or skipped checks. A kit that fits a similar model may still be wrong for a particular trim or suspension option. Read the full instructions before starting and verify every part against the vehicle.
Do not set ride height by guesswork or use a generic torque value for a critical fastener. Do not assume that the car is safe because all bolts appear tight. Use the correct procedure, tools, and final inspections for the exact application.
Source: f2suspension.com
Buying an incompatible kit
Check model year, trim, drivetrain, body style, and factory suspension options before ordering.
Using unsafe spring tools
Never remove a loaded spring without a suitable compressor and the correct procedure.
Ignoring worn components
Inspect mounts, bushings, dampers, and hardware while the suspension is apart.
Skipping alignment
Do not assume the original wheel angles remain correct after changing ride height.
Lowering the car too far
Preserve suitable suspension travel and check ground clearance, tire clearance, and local road-use rules.
What If the Installation Does Not Go as Planned?
If a new assembly does not line up with the mounting points, stop and confirm the part number and installation orientation. Never force a component into place or modify a safety-critical part unless the manufacturer explicitly specifies an approved procedure.
If a fastener is seized, a mount is damaged, or a spring will not seat correctly, pause the job. Use the vehicle-specific service procedure or seek help from a qualified technician instead of improvising.
Unexpected fitment issue
Verify the kit, mounting hardware, orientation, and vehicle application.
New noise or poor handling
Stop driving if the car seems unsafe and arrange a professional inspection.
Ride height differs from the plan
Check the maker’s setup procedure and allow for any specified settling period before making further changes.
Which Suspension Upgrade Should You Choose?
Choose the option that meets your driving goals and fits your skills, budget, and car. If you want a modest drop and your existing dampers are in good shape, compatible lowering springs may offer the simpler ownership choice. If you want a matched spring and damper package or adjustable ride height, coilovers may justify the higher cost and setup work.
For a daily driver, comfort, road clearance, tire life, and reliable handling deserve as much attention as appearance. For a track car, consider the kit’s intended use and the value of adjustment. In either case, installation ease is only one part of the decision.
Before buying, request a complete installed quote for both options and confirm whether alignment and required hardware are included. Check the maker’s application guide and installation manual, then decide whether the additional adjustability of coilovers serves a real need.
Best fit for a modest drop
A compatible lowering spring kit can be a sensible choice when the original dampers are healthy and the target ride height is modest.
Best fit for adjustability
A suitable coilover kit can make sense when ride-height or damping changes are part of the plan.
Best fit for limited DIY experience
Compare professional labor quotes and choose a qualified installer rather than selecting a part solely because it seems easier to fit.
A Quick Decision Checklist
Use these questions to narrow the choice before you order parts. The best answer is the one that balances installation effort with the way you use the car.
Do you need adjustment?
If not, a spring kit may be enough. If you need adjustable ride height or damping, look at coilovers that provide those features.
Are your original dampers healthy?
If they are worn, include replacement dampers in the comparison rather than pricing springs alone.
Can you install the parts safely?
If you lack the tools or knowledge for spring compression and suspension assembly, budget for professional labor.
Does the total cost fit your budget?
Compare the full installed price, alignment, hardware, and future service needs.
Frequently Asked Questions
Q
Are coilovers easier to install than lowering springs?
Often, yes. A complete coilover assembly can replace the original spring and damper as one unit, which avoids transferring the original spring. The exact difficulty depends on the car, the kit, and whether extra setup or parts are needed.
Q
Can I install coilovers without a spring compressor?
A complete coilover assembly may not require a spring compressor for installation if it arrives fully assembled and the procedure does not call for spring disassembly. However, the original suspension may still require special tools. Never take apart a loaded spring assembly without suitable equipment and the correct service procedure.
Q
Are lowering springs cheaper to install?
Lowering springs often have a lower purchase price, but labor can include removing the original spring and fitting the replacement. Total cost depends on the vehicle, local labor rates, damper condition, hardware, and alignment. Compare complete installed quotes to see which option costs less.
Q
Do coilovers need an alignment after installation?
Yes, a wheel alignment is generally needed after installing coilovers, especially when ride height changes. The suspension work can alter wheel angles and affect handling and tire wear. Follow the kit maker’s instructions and have a qualified shop check the alignment.
Q
Are coilovers better for daily driving than lowering springs?
Not always. Ride comfort and handling depend on spring rates, damper tuning, suspension travel, road conditions, and the quality of the parts. Compatible lowering springs can work well for a modest drop, while well-chosen coilovers can offer more adjustment. Choose a setup designed for your daily driving needs.
✦ Wrapping Up
Conclusion
Coilovers are often easier to install than lowering springs when a complete assembly replaces the original spring and damper. Lowering springs can require more work because the original spring must be safely removed and replaced. Yet vehicle layout, kit design, rust, and installer skill can change the result.
The right choice depends on more than labor time. Consider ride comfort, damper condition, adjustment needs, total installed cost, and the tools required. Safe installation and correct alignment matter for both options.
💡 Key Takeaway
Check your exact vehicle fitment, read the installation instructions, and get comparable quotes for complete coilover and lowering spring installations. Include alignment and required hardware, and use a qualified technician if you cannot complete the work safely.
Eric
Hi, I’m Eric Bennett, the person behind OffRoadTruckAccessories.com.
I created this blog to share my interest in trucks, off-road driving, automotive accessories, and DIY modifications. I enjoy learning how different truck accessories work, testing their usefulness, and understanding whether they are truly worth buying.
Will G37 coilovers fit G35? Learn which model years may share fitment, what changes with coupe, sedan, and AWD setups, and how to verify compatibility.