
How to lower divorced coilovers safely for better ride height
Lowering a car with divorced coilovers is not simply a matter of turning a collar until the fender sits closer to the tire. In this layout, the coil spring and shock absorber are mounted separately. The spring usually sits on an adjustable perch, while the shock has its own body or lower-mount adjustment.
Changing one without checking the other can reduce suspension travel, create spring slack, or leave the shock operating in an unsuitable part of its stroke.
The attainable goal is a modest, measured ride-height change that keeps the spring properly seated, preserves enough bump and droop travel, and leaves the car predictable on the road. The exact adjustment method varies by suspension kit, so the manufacturer’s instructions and the vehicle’s service manual take priority over any general guide.
This article explains how to lower divorced coilovers using the spring perch, how to measure the result, what to inspect before driving, and when to stop instead of forcing an adjustment. You will also learn why lowering the spring perch is different from shortening the shock, why alignment is part of the job, and how to identify a setup that has gone too far.
At a glance
- Measure from repeatable suspension points before and after every adjustment.
- Keep the spring captive through the full range of suspension movement; do not rely on preload alone to solve poor fitment.
- After changing ride height, inspect travel and get a four-wheel alignment before treating the job as finished.
How to lower divorced coilovers safely for a controlled ride height
On most divorced coilover systems, the normal height adjustment is made at the threaded spring perch or lower spring seat, not by randomly shortening the shock. The spring perch supports the vehicle’s weight, so moving it changes the installed spring position and therefore the ride height. Some kits also provide a separate threaded shock body or lower mount; that feature may allow the shock length to be corrected after the spring position changes, but it must be used exactly as the kit maker specifies.
Tools you will need
- Vehicle service manual or coilover installation instructions, for adjustment limits and torque specifications
- Quality floor jack and jack stands rated for the vehicle, used on approved lifting and support points
- Wheel chocks, to prevent movement while the vehicle is raised
- Coilover or hook spanner wrench that fits the adjustment collars
- Socket set and torque wrench, for wheel and suspension fasteners
- Steel tape measure or ride-height gauge, for repeatable before-and-after measurements
- Paint marker or chalk, to mark the original collar position
- Optional: penetrating fluid and a nylon or brass brush, for dirty or lightly corroded threads
Step 1 Confirm the suspension layout and the kit’s adjustment limits
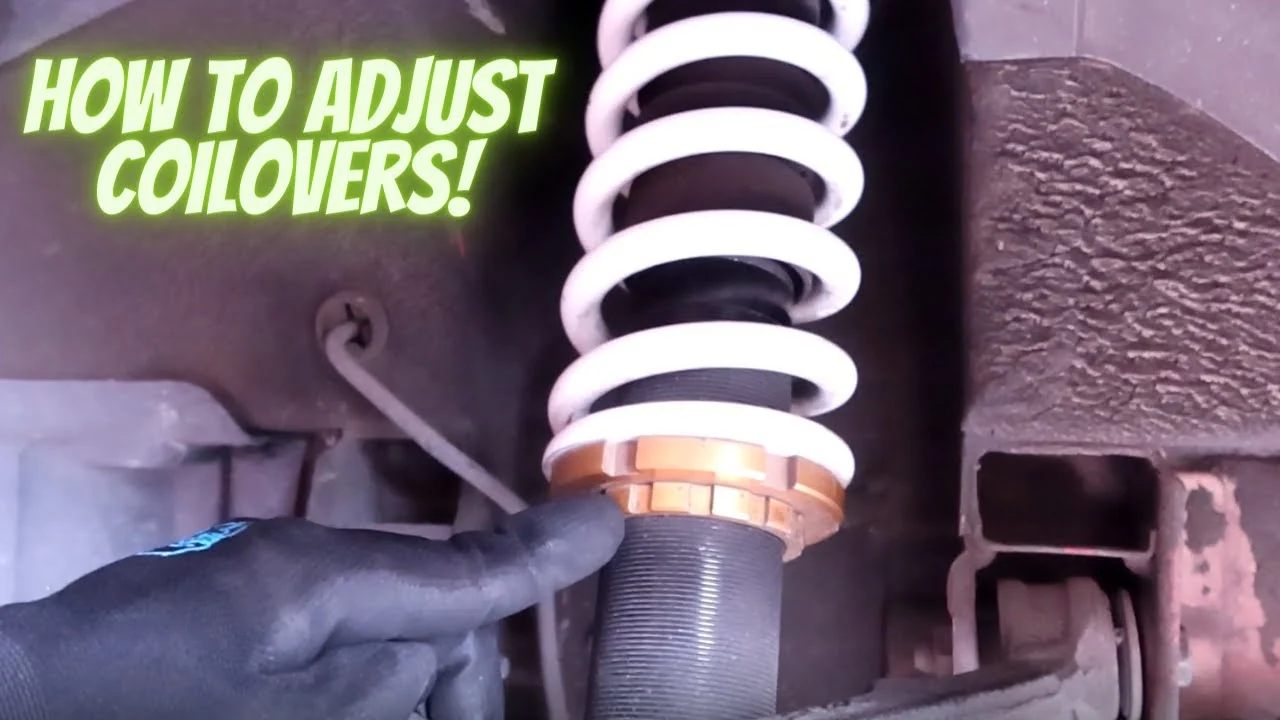
Look at the rear suspension and identify the separate spring and shock. The coil spring will normally sit between a lower spring perch and an upper rubber or metal seat, while the shock absorber is mounted nearby rather than inside the spring. Find the threaded adjustment collar, lock ring, and any separate shock-length adjustment before loosening anything.
Read the instructions for the exact coilover kit. Some divorced systems use a threaded lower spring perch; others use a threaded cup, sleeve, or an adjustable lower mount. The threads may be intended only for height adjustment, while a separate lock ring secures the setting.
Do not assume that a collar from one brand works the same way as another.
Check the manufacturer’s minimum and maximum spring-seat positions, minimum thread engagement, and minimum shock length. If those limits are missing, the kit is damaged, or the collars are seized, stop and obtain the correct information rather than guessing.
Step 2 Prepare the car and record a baseline
Park on a level, hard surface with the transmission in Park or in gear and the parking brake applied. Chock the wheels that will remain on the ground. Remove unnecessary cargo, keep the fuel level reasonably consistent, and use the same wheel and tire pressures you normally run.
Before lifting the car, measure the current height at each corner. A repeatable method is to measure from the center of the wheel hub vertically to the lower edge of the fender, because this reduces the effect of tire pressure and tread shape. You can also measure from the ground to the fender, but hub-to-fender measurements are generally easier to compare after a tire is removed.
Write down the measurement for both sides of the axle and photograph the threaded collars. Mark the original collar position with a paint marker. This gives you a known starting point and makes it possible to return to the previous setting if the new height creates a problem.
Step 3 Raise the vehicle and support it securely
Loosen the wheel lug nuts slightly while the vehicle is on the ground, if the wheel must be removed. Then lift the vehicle at the approved jacking point and place jack stands under the manufacturer’s specified support points. Lower the vehicle onto the stands and give the body a careful push to confirm it is stable before working underneath.
Remove the relevant wheel or wheels so you can see the spring perch, lock ring, spring ends, shock body, brake lines, and nearby suspension links. If the adjustment affects both sides of an axle, supporting the chassis correctly may allow the suspension to hang naturally, but do not place the stands under a moving suspension arm unless the service instructions specifically call for that arrangement.
Important
Never work under a vehicle supported only by a floor jack. If a spring is loose, damaged, badly corroded, or under unusual tension, stop and have the suspension inspected by a qualified technician instead of trying to force the collar.
Step 4 Clean and unlock the adjustment collars
Brush dirt and rust from the exposed threads with a nylon or brass brush. Avoid striking the threads with a hardened steel tool, and do not heat a coilover body unless the manufacturer and a qualified technician approve that procedure; heat can damage seals, coatings, and nearby components.
Use the correct spanner wrench to loosen the lock ring while holding the adjustment collar as directed by the kit instructions. Mark the collar and a fixed reference point before turning it. If the threads will not move with reasonable force, apply an appropriate penetrant, allow it to work, and reassess the condition.
A damaged or cross-threaded collar is a replacement or repair issue, not a reason to use a hammer.
Count and record the adjustment change. For example, note the number of flats, turns, or exposed threads rather than relying on memory. Make equal changes on both sides of the axle when the goal is to lower the car evenly.
Step 5 Lower the spring perch in a small, measured adjustment
Turn the spring perch in the direction that moves it away from the spring’s upper seat and lowers the supported position, using the kit’s instructions to confirm direction. Make a small change first rather than moving directly to the lowest available setting. The relationship between collar movement and actual ride-height change is not always one-to-one, especially when the spring is installed at an angle or the suspension has a motion ratio.
Keep the spring end aligned with the locating pocket or stop in the upper and lower seats. The spring should remain centered and should not rotate into contact with the tire, brake hose, body, or suspension arm. Do not cut the spring, remove a spring seat, stack improvised spacers, or leave a lock ring loose to gain additional height adjustment.
When the spring perch is in its new position, set the lock ring against it and tighten it according to the kit instructions. Do not substitute an impact wrench for the specified spanner-wrench procedure unless the manufacturer explicitly permits it. Over-tightening can damage the collar or threads, while under-tightening can allow the setting to change.
A useful way to approach how to lower divorced coilovers is to check your progress after each stage.
Step 6 Check spring seating and shock position at full droop
With the suspension hanging, inspect whether the spring remains firmly located between its seats. A small amount of movement can be normal on some systems, but a spring that can fall out, turn sideways, or lose contact with its seat is not safe to drive. The correct limit comes from the coilover manufacturer, not from how the car looks when parked.
Also inspect the shock absorber at full droop. Make sure the shock is not pulled tight before the suspension reaches its normal mechanical limit, and check that brake hoses, ABS wires, parking-brake cables, and sway-bar links are not stretched or kinked. If the shock has an adjustable lower mount, do not use that adjustment to create extra spring preload unless the instructions specifically describe that procedure.
Lowering the spring seat can leave the shock too extended at rest or reduce available compression travel. If the kit provides a way to change shock length independently, set it only within the documented range. Otherwise, a lower ride height that causes poor travel or a loose spring is beyond a safe collar adjustment.
Step 7 Reinstall the wheels and settle the suspension
Reinstall the wheels and hand-tighten the lug nuts. Raise the vehicle slightly, remove the jack stands, and lower it to the ground. Tighten the lug nuts in a crisscross pattern to the vehicle manufacturer’s torque specification.
Roll the car forward and backward several feet, or drive it slowly over a flat area, so the suspension can settle. Do not judge the final height while the car is still hanging on the stands. Bounce each corner gently or apply light hand pressure to help the suspension return to its normal position, then place the car on the same level surface used for the baseline.
Step 8 Measure both sides and correct uneven height
Repeat the hub-center-to-fender measurements at all four corners. Compare each side of the adjusted axle and compare the new measurements with your baseline. A small difference can result from the surface, tire pressure, fuel load, or bushing friction, so repeat a suspicious measurement before making another adjustment.
If one side is clearly higher, check that both spring ends are seated correctly and that the collars were moved by the same recorded amount. Correct the adjustment in small increments, then settle and measure again. Do not compensate for a bent component, worn spring, damaged mount, or accident damage by setting one collar dramatically different from the other.
Step 9 Inspect clearance and perform a careful first drive
Turn the steering from lock to lock and inspect tire clearance at the front. At the rear, check clearance around the inner fender, spring, shock, brake line, and suspension links. Look for contact marks, freshly rubbed coating, or a tire that sits unusually close to a component.
Drive slowly on a familiar, smooth route and listen for clunks, scraping, spring movement, or a sudden change in steering behavior. Avoid hard cornering, potholes, and high speed during this first check. After the drive, recheck the collar position, wheel fasteners, and visible clearance.
A successful first check means the spring remains seated, there is no interference, the ride height is close to the measured target, and the car behaves normally. That is not yet a substitute for alignment; lowering changes suspension geometry even when the vehicle feels acceptable.
What changes when a divorced coilover is lowered
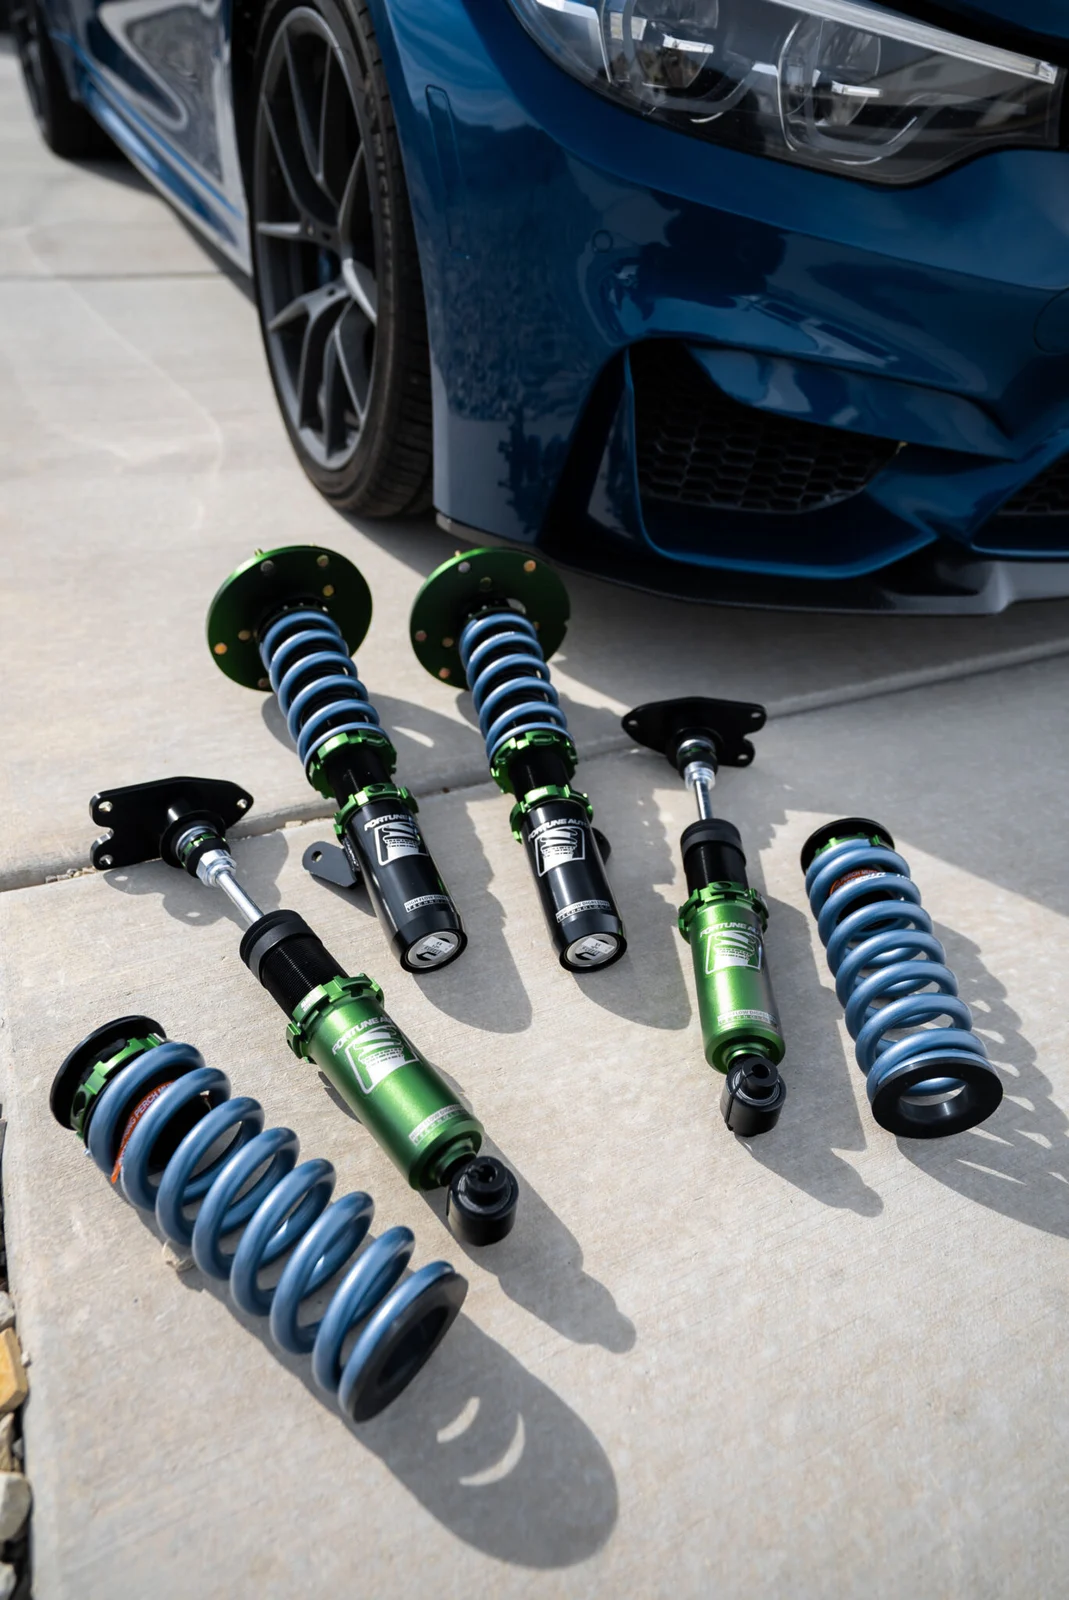
A divorced coilover separates the spring’s load path from the shock absorber. The spring supports the vehicle, while the shock controls the speed of suspension movement. Because these parts are separate, changing the spring perch can alter ride height without directly changing the shock’s internal damping, but it can still change how much of the shock’s travel is available in each direction.
Spring preload is not the same as ride height
Spring preload is the amount a spring is compressed when the suspension is assembled and the vehicle is at full droop. On a conventional height-adjustable coilover, the spring perch may be moved while the shock body or lower mount preserves preload. On a divorced system, the spring perch often directly determines the installed spring position, so preload and ride height can be linked.
Adding preload to a linear-rate spring does not automatically make the vehicle sit higher once the car is resting on the spring. It can make the spring more secure at droop and can change the point at which the suspension begins to move, but the static height depends mainly on spring load, spring rate, and installed length. That is why the kit’s intended adjustment method matters.
Suspension travel matters more than the visual gap
When the car is lowered, the suspension begins closer to the bump stop. This can reduce compression, or bump, travel before the stop engages. At the same time, there may be less droop travel available before the shock reaches full extension.
Either condition can make the car ride harshly, lose grip over uneven pavement, or place excessive load on mounts and links. Understanding how to lower divorced coilovers also means recognizing the limits of the method.
A low-looking car is not automatically well set up. The tire must clear the body through steering and suspension movement, the spring must stay captured, and the shock must operate within its intended stroke. If lowering requires removing bump-stop material, shortening a shock, or changing suspension geometry, follow the kit and vehicle instructions or use a qualified suspension shop.
Do not use the shock body as a substitute for the spring adjustment
Some adjustable coilovers use a threaded shock body or lower mount to change overall length while preserving spring preload. Others do not. On a divorced system, a lower shock mount may adjust only the shock’s position; it may not be designed to support the vehicle or set the ride height.
Using the wrong threaded section can reduce thread engagement, alter the shock’s working range, or transfer loads into parts that were not designed for them. If you cannot identify which collar supports the spring and which part adjusts shock length, pause before turning anything.
How to verify the finished setup
The job is complete only after the height, hardware, movement, and geometry have been checked. A visual inspection from outside the car can miss a spring that unseats at full droop or a brake line that becomes tight only when the wheel is turned.
Use repeatable measurements
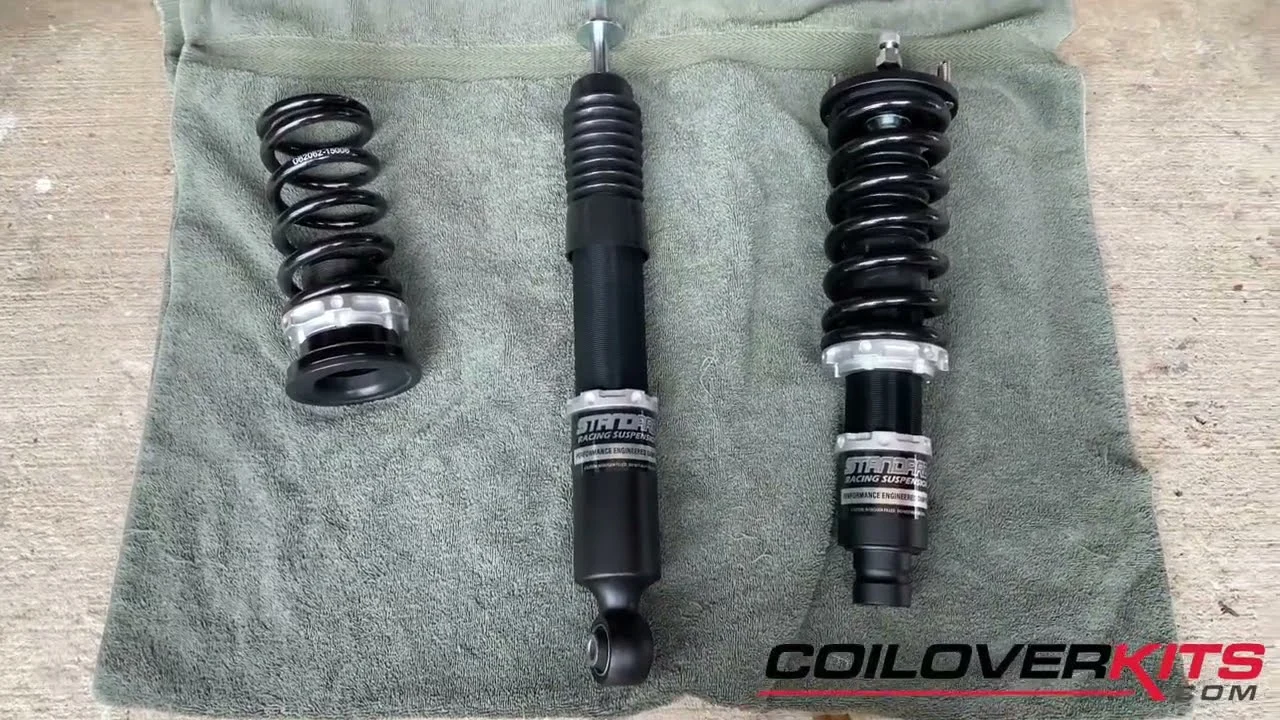
Record the final hub-to-fender measurements for every corner and note the number of collar turns from the original setting. If the vehicle has adjustable spring seats on both sides, keep a written record of the final exposed-thread length or collar position. This makes future maintenance and troubleshooting much easier.
- Measure on a level surface with consistent tire pressures.
- Use the same reference points at every corner.
- Compare left and right on the same axle.
- Repeat an unexpected result before making another adjustment.
- Keep the original settings recorded in case you need to reverse the change.
Check movement without relying on guesswork
With the wheels installed, inspect clearance at normal ride height and through steering movement. If you have access to a lift or safe suspension-support method, check both full droop and near-compression positions. Do not place any part of your body in a pinch zone while moving the suspension.
Look for contact between the tire and fender liner, spring, shock, brake hose, ABS wire, sway-bar link, and chassis. Fresh shiny marks, shaved rubber, bent brackets, or damaged coating indicate contact that must be corrected before regular driving.
Get a four-wheel alignment
Lowering changes camber, toe, and sometimes caster or thrust angle. Rear toe is especially important because a small change can affect stability and tire wear even if the steering wheel appears centered. Have the vehicle aligned after the final ride height is established.
Ask for the alignment printout and compare the readings with the vehicle manufacturer’s specifications or the settings recommended for the suspension kit. If the desired geometry cannot be reached with the available adjustment, do not keep lowering the car to chase a visual target; the setup may need compatible control arms, camber adjustment, or a different spring and shock combination.
Common problems after lowering divorced coilovers
Most problems come from treating the spring perch as the only variable. The following symptoms help separate a simple measurement issue from a setup that needs inspection.
| Symptom | What to inspect first |
|---|---|
| Spring moves or rattles at full droop | Spring seating, installed length, preload, and the kit’s captive-spring requirement |
| Ride becomes harsh or repeatedly bottoms | Available bump travel, bump-stop engagement, shock position, and excessive lowering |
| One side sits higher | Unequal collar movement, spring seating, tire pressure, bushings, or bent components |
| Clunking after adjustment | Loose lock ring, mount hardware, sway-bar link, spring-end contact, or damaged threads |
| Tire rubs after lowering | Wheel offset, tire size, alignment, fender clearance, and suspension travel |
When the collars are seized
Do not force a seized collar with a long breaker bar or strike it until it turns. Clean the threads, use a suitable penetrant, and use the correct spanner wrench. If the collar or thread is visibly distorted, remove the part for professional inspection; a damaged adjustment mechanism can fail to hold its position.
When the car is lower than expected
Confirm that the spring is seated in both pockets and that the rubber isolators are installed in the correct locations. Check whether the spring has sagged, whether the vehicle is carrying an uneven load, and whether a bump stop is holding the suspension in an abnormal position. Do not raise only one side to disguise a mechanical problem.
When the car feels unstable after the change
Stop driving it aggressively and inspect tire pressure, lug torque, alignment, shock mounting, and suspension hardware. Lowering can expose worn control-arm bushings, loose links, or inadequate alignment that was less noticeable at the original height. A persistent pull, steering-wheel offset, wandering rear end, or repeated tire contact deserves a professional inspection.
Divorced coilover questions beginners often ask
Can I lower divorced coilovers by cutting the springs?
No. Cutting a coil spring changes its rate, installed length, and end shape, and it can prevent the spring from seating securely. Use the adjustment built into the suspension kit or install a spring designed for that application.
How low should I set divorced coilovers?
Set the lowest height that still preserves the manufacturer’s required spring capture, shock travel, clearance, and alignment range. The correct height depends on the vehicle, spring rate, wheel and tire combination, and the kit’s design, so a universal measurement is not safe.
Do I need an alignment after lowering the car?
Yes. Even a modest ride-height change can alter toe and camber. Drive only as much as necessary to reach an alignment facility, and inspect for rubbing or unstable handling before doing so.
Why is one side higher after equal collar adjustments?
Equal turns do not always produce equal final height if the springs were not seated identically or if the vehicle has uneven loading, worn bushings, different tire pressures, or a bent component. Settle the suspension, remeasure, and investigate the cause before making a large correction.
Can I adjust the shock shorter to lower the car?
Only if the kit specifically provides a shock-length adjustment and explains how to use it. A shock mount or threaded body may not be intended to set ride height, and shortening the shock incorrectly can remove travel or reduce thread engagement.
Finish the adjustment with measurements, travel, and alignment
Learning how to lower divorced coilovers safely means adjusting the spring support in a controlled way, not pursuing the smallest fender gap at any cost. Record the original settings, move the spring perch gradually, keep the spring captured, inspect shock travel and clearance, and measure the settled result on both sides.
If the spring becomes loose, the shock reaches its limit, the tire rubs, or the car cannot be aligned within an appropriate range, return to a safer height and seek suspension-specific help. Once the hardware passes inspection, have the vehicle aligned and keep the final measurements and collar settings for future checks.


