To check a track bar, inspect its mounting bolts, bushings, joints, and bar for damage, then check for unwanted movement while a helper safely moves the steering wheel or suspension. Use the vehicle service manual to confirm the correct inspection method and fastener torque.
On American roads, a loose or worn track bar can affect how a solid axle stays centered beneath a vehicle. This matters on many Jeep Wrangler and Cherokee models, solid-axle pickup trucks, and other vehicles that use a track bar in the suspension. Symptoms may include a clunk over bumps, loose steering, or a front axle that appears off-center. These signs can also come from other suspension or steering parts, so a careful inspection is needed before replacing anything.
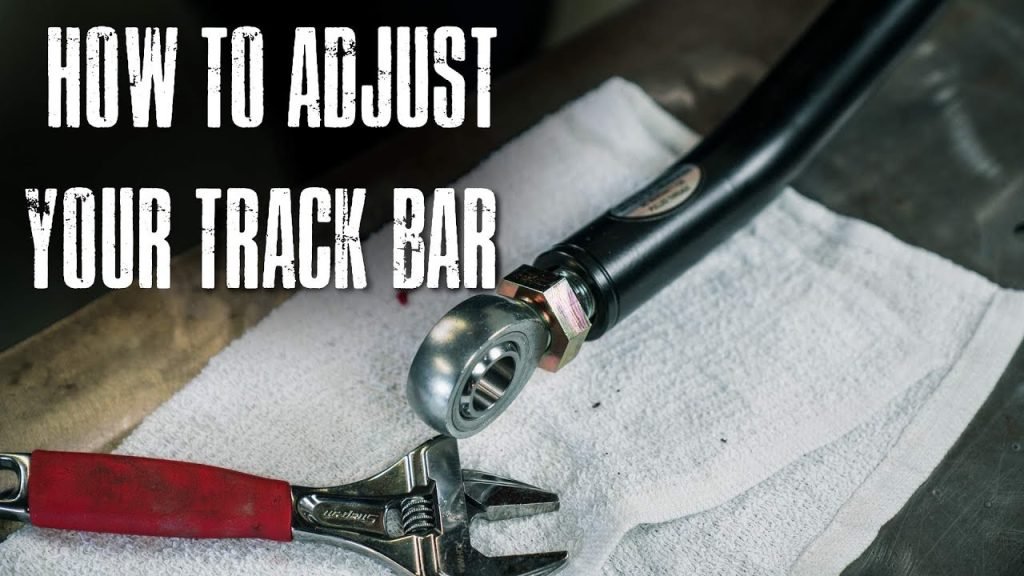
A track bar, also called a panhard bar, links the axle to the vehicle frame and limits side-to-side axle movement. Its bushings or joints allow the suspension to move while keeping the axle under control. Checking the bar means looking for damage and wear, checking its attachment points, and finding out whether any movement comes from a worn joint, a loose fastener, or another part. This guide explains how to perform a basic inspection at home and when a professional diagnosis is the safer choice.
A track bar keeps a solid axle from shifting too far from side to side relative to the vehicle body. One end attaches to the axle or an axle-mounted bracket, and the other attaches to the frame or a frame-mounted bracket. The bar controls lateral movement as the suspension rises and falls.
The track bar does not perform the same job as a shock absorber or a control arm. Shock absorbers help control suspension motion, while control arms generally manage axle position in other directions. The track bar mainly limits side-to-side movement. A fault in its mounts can therefore affect steering feel and axle location.
Some independent-suspension vehicles do not use a track bar at all. Before starting, confirm that your vehicle has one and identify whether the bar is fitted at the front or rear. A vehicle-specific service manual or suspension diagram can help you locate it.
Source: storage.googleapis.com
Track bar body
The steel bar or tubular link carries lateral loads between the axle and frame. Bends, cracks, severe corrosion, or damaged threads need further assessment.
Bushings and joints
Rubber bushings, spherical joints, or other approved ends allow controlled articulation. Excessive play, separation, torn rubber, or a loose joint may indicate a fault.
Mounting brackets and bolts
The brackets and fasteners hold the bar in place. Cracks, elongated holes, shifted hardware, or movement at a mount can undermine axle control.
Why Track Bar Condition Matters
When the bar or its attachment points become loose, the axle may shift laterally more than intended. That movement can change how the steering responds, especially on vehicles with a solid front axle. It may also produce a knock when the suspension changes direction.
A worn track bar is not the only cause of these symptoms. Loose steering linkage, worn ball joints, damaged control arm bushings, wheel-bearing problems, and loose suspension hardware can produce similar complaints. Inspect the whole system rather than assuming the bar is responsible.
Main inspection goal
Find abnormal movement or physical damage at the track bar and its mounts, then identify the exact source before ordering parts.
Tools and Safety Preparations
You can perform much of a visual track bar inspection with a flashlight and a clean work area. Checking for movement may require a helper, and verifying fastener torque requires a suitable torque wrench and the correct service information. Some tests need a vehicle lift or specialized equipment.
Park on firm, level ground, set the parking brake, and place the transmission in Park or in gear as appropriate. Chock the wheels that will remain on the ground. Switch off the engine and remove the key before performing a static inspection. Never place any part of your body beneath a vehicle supported only by a jack.
If a wheel must be lifted, use the manufacturer-approved lifting points and correctly rated jack stands on a suitable surface. Do not rely on a hydraulic jack alone. Keep hands away from pinch points, and never ask a helper to operate the steering wheel while you are touching moving joints or working in a hazardous position.
Source: carpartsfaq.com
Basic tools
Prepare a flashlight, inspection mirror, safety glasses, gloves, wheel chocks, and a notebook or phone to record findings.
For fastener checks
Use the correct sockets and a calibrated torque wrench only if the service procedure calls for a torque check. Confirm the specified value and tightening conditions for the exact vehicle.
For movement checks
Use a helper only when the inspection can be carried out safely. A professional lift or technician may be needed to see the joint while the suspension is loaded.
When Not to Perform a Home Inspection
Do not continue if the vehicle cannot be supported securely, a mounting bracket appears cracked, a bolt is missing, or the bar seems close to separating from its mount. Do not drive a vehicle with severe steering looseness or clear loss of axle control. Arrange professional inspection and towing when needed.
A vehicle with modified suspension may need a different inspection method from a stock vehicle. Lift height, aftermarket brackets, adjustable track bars, and different joint designs can change the correct procedure. Use instructions that match the installed parts.
Safety limit
Stop if any part of the suspension may fail or if you cannot inspect it without placing yourself in a pinch zone.
Step 1: Locate the Track Bar
Start by identifying the track bar on the vehicle. On many solid-front-axle vehicles, it runs diagonally between a frame bracket and an axle bracket. The exact orientation and location vary by model, so use the vehicle’s suspension diagram if the bar is not obvious.
Look for a sturdy metal link with a bushing or joint at each end. Do not confuse it with a steering drag link, tie rod, sway bar link, or control arm. These parts may sit close together but have different functions and inspection requirements.
If the vehicle has front and rear track bars, inspect each one separately. A rear track bar can cause lateral axle movement or noises even when the front suspension appears normal. Record which bar you are checking so the findings are clear.
Source: storage.googleapis.com
Confirm both ends
Trace the entire bar from one mounting point to the other. Identify its axle-side and frame-side attachment points before inspecting the hardware.
Check installed modifications
Note any adjustable sleeve, aftermarket joint, relocated bracket, or nonstandard fastener. These features may require part-specific inspection instructions.
How to Tell a Track Bar From a Steering Link
A track bar connects the axle assembly to the frame and controls lateral axle movement. A steering link connects steering components and transmits steering input. Both can move as the suspension or steering changes position, but they are not interchangeable.
If you cannot identify the component with confidence, consult the parts diagram for the exact year, make, model, and drivetrain. Inspecting the wrong link can lead to an incorrect diagnosis and missed safety problems.
Identification rule
Follow the component to both endpoints rather than identifying it by shape or position alone.
Step 2: Inspect the Track Bar for Visible Damage
With the vehicle safely parked, inspect the full length of the track bar. Look for bends, cracks, deep rust, damaged welds, and signs that the bar has struck another component. Surface discoloration alone does not prove a structural fault, but heavy corrosion or flaking metal deserves closer assessment.
Pay close attention to the areas around the ends, threaded adjusters, jam nuts, and welded brackets. These locations can carry high loads. Look for fresh scrape marks, metal dust, shiny contact spots, or paint that has cracked around a joint or mounting point.
Check whether the bar appears to contact the differential housing, steering linkage, exhaust, frame, or other nearby parts. Contact marks may indicate clearance problems, incorrect installation, or a suspension modification that needs review. Do not bend or reposition the bar to make it fit.
Source: 1964buick.com
Cracks or severe corrosion
Treat structural cracks, broken welds, or corrosion that may weaken the bar as serious defects. Stop driving if the part may fail and have it assessed.
Bends or impact marks
A visibly bent bar may have suffered an impact or been installed incorrectly. Compare it with the correct part specification rather than trying to straighten it.
Interference
Fresh rubbing marks can reveal inadequate clearance. The source may be an incorrect part, altered suspension geometry, or a loose mount.
What Counts as Normal Wear?
A clean metal surface, minor cosmetic scratches, and small amounts of ordinary surface rust may not affect function. The important question is whether the material or mounting structure has lost strength, changed shape, or developed movement.
There is no single visual threshold that applies to every track bar. Material thickness, construction, corrosion location, and manufacturer limits matter. If rust has reduced the section around a joint or bracket, have a qualified technician assess it.
Do not guess
Use the service information or a qualified inspection when damage is near a weld, threaded section, or loaded mounting point.
Step 3: Check Track Bar Bushings and Joints
The ends of the track bar deserve close attention because their bushings or joints allow movement while holding the axle in position. Inspect each end for torn rubber, separated bonding, missing sleeves, cracked housings, damaged boots, or grease leakage where the joint design uses a protective boot.
A bushing can look acceptable from one angle yet show excessive movement under load. Conversely, normal flex in a rubber bushing does not automatically mean it has failed. The key is whether the movement stays within the intended range and whether the inner sleeve, outer housing, or joint moves abnormally relative to its mount.
Use a flashlight and inspection mirror to look around the full circumference of each end. Look for a bushing that has shifted out of place or a joint housing that is no longer secure. Do not insert fingers between loaded parts or use force that could damage the rubber or boot.
Source: www.motortrend.com
Torn or separated rubber
Cracks that extend through the rubber, separation from a bonded sleeve, or a bushing pushed out of its housing may indicate the need for replacement.
Joint looseness
A joint that moves excessively, clicks, or shifts at its mounting interface needs further diagnosis against the component’s specifications.
Damaged protective boot
A torn boot can let contaminants enter a joint. Whether the joint can be serviced or must be replaced depends on its design.
How to Check for Bushing Movement
The correct test depends on the vehicle and joint design. Some service procedures require the suspension to carry its normal load, while others specify a raised wheel or unloaded suspension. Follow the applicable procedure instead of assuming one setup works for every vehicle.
If the manual permits a movement check with the vehicle stationary, have a helper gently move the steering wheel through the specified range while you observe the relevant mounting area from a safe position. Watch for movement between the bar end, inner sleeve, bolt, and bracket. Do not place your hands near the joint during the test.
For a rear track bar, a technician may need to apply a controlled load to the suspension to expose movement that is not visible at rest. If you cannot safely reproduce the condition, record the symptoms and arrange a professional inspection.
Healthy result
The bar ends remain securely attached, and any bushing flex appears consistent with the design without separation, impact, or abnormal free play.
Fault result
Visible shifting at the mounting interface, a loose joint housing, or movement beyond the specified limit calls for repair or further diagnosis.
Step 4: Check Track Bar Bolts and Mounting Brackets
Loose fasteners and damaged brackets can cause the same symptoms as worn bushings. Inspect the bolts at both ends for missing hardware, backed-out threads, damaged heads, corrosion, and signs that the bolt or washer has shifted. Also inspect the bracket around each mounting hole for cracks, distortion, and elongated holes.
A small amount of movement at a mounting bolt can produce a noticeable clunk under changing loads. If the bracket hole has become oval or the bolt has damaged the surrounding metal, tightening the fastener alone may not restore a secure connection. The damaged parts need proper assessment and repair.
Do not tighten track bar bolts by feel. Fastener size alone does not tell you the correct torque. The required value can depend on the vehicle, model year, bolt location, hardware type, and whether the suspension is at normal ride height during tightening.
Source: storage.googleapis.com
Inspect the fasteners
Look for missing bolts, displaced washers, damaged threads, and evidence of movement at the joint. Follow the service manual for any torque verification.
Inspect the brackets
Check for cracks near welds, deformation around the bolt hole, and movement between the bracket and its supporting structure.
Check previous repairs
Look for incorrect bolt lengths, improvised spacers, damaged threads, or hardware that does not match the vehicle or approved aftermarket kit.
Should You Tighten a Loose Track Bar Bolt?
Only tighten a bolt after confirming the correct hardware, torque specification, and tightening procedure. Some suspension fasteners must be tightened at normal ride height to avoid unwanted bushing preload. Other joints have different requirements, so follow the exact service instructions.
If a bolt keeps loosening, the threads are damaged, the bracket hole is enlarged, or the joint moves after tightening, do not keep applying more force. The underlying cause may be damaged hardware, a worn joint, a failing bracket, or an installation error.
Avoid over-tightening
Excess torque can damage threads, stretch or break fasteners, or distort components. Use the specified value and an appropriate torque wrench.
Step 5: Check for Excessive Movement
A movement check can help confirm a suspected fault, but the test must match the suspension design. On some solid-front-axle vehicles, a technician observes the track bar and its mounts while a helper gently moves the steering wheel with the vehicle safely positioned. Any abnormal shift should be traced to its source rather than judged by steering movement alone.
Before starting a helper-assisted test, read the vehicle’s service procedure. Agree on when the steering will move and where each person will stand. Keep your body, tools, and clothing clear of the steering linkage, tires, axle, and any other part that may move. Never place your hands between the track bar end and its bracket.
Watch the attachment points rather than the entire suspension alone. The axle and bar may move through their intended range, especially as the suspension changes position. A fault is more likely when the joint slips within the mount, a fastener shifts, or the bracket moves in a way the design does not permit.
Source: www.motortrend.com
Observe the axle-side mount
Look for unwanted movement between the track bar end, bolt, and axle bracket during the approved test.
Observe the frame-side mount
Check for shifting at the frame bracket, loose hardware, or a cracked supporting structure.
Compare both ends
A secure end and a moving end can help narrow the cause. Continue checking related steering and suspension components if the source remains unclear.
What If You Cannot See Any Play?
No visible movement during one test does not prove the track bar is healthy. Some faults appear only when the suspension is loaded in a certain way, when the vehicle crosses an uneven surface, or when the joint is moved through a particular range.
If clunks, steering wander, or other symptoms persist, ask a technician to inspect the suspension under the conditions specified by the manufacturer. A road test may help reproduce the complaint, but do not perform one if steering control is uncertain or a major attachment fault is suspected.
Next step
Record when the symptom occurs, whether it comes from the front or rear, and any recent suspension work. This helps guide a targeted diagnosis.
Step 6: Look for Track Bar Symptoms During Normal Use
Driving symptoms can help identify a track bar problem, but they cannot confirm one on their own. If the vehicle is safe to operate and has no serious steering or attachment fault, note when the noise or handling change occurs. Do not deliberately drive over potholes or make sudden maneuvers to reproduce a suspected defect.
A clunk over bumps may come from a loose track bar bolt, a worn bushing, a sway bar link, or another suspension part. Steering wander may involve the track bar, steering linkage, tire condition, alignment, or several issues at once. A visible axle offset can also result from suspension lift geometry or an incorrect bar length.
Stop driving if the steering becomes unpredictable, the axle visibly shifts, a mounting bracket is cracked, or a track bar attachment is loose enough to threaten control. Have the vehicle towed for inspection when continuing to drive could be unsafe.
Source: www.motortrend.com
Clunking or knocking
Inspect track bar joints and mounts, then check nearby links and control arms for looseness that could create similar noise.
Loose or wandering steering
Check the track bar along with the tie rods, drag link, ball joints, steering gear mounts, tires, and alignment.
Axle appears off-center
Confirm ride height, suspension modifications, and track bar length. An offset alone does not prove a worn joint.
Vibration or steering shake
Inspect tires, wheel balance, steering joints, wheel bearings, and suspension mounts. A track bar fault is only one possible cause.
Track Bar Symptoms Versus Other Faults
Symptoms often overlap, so the best diagnosis links a complaint to a visible or measurable defect. For example, a clunk that occurs when the load reverses may lead a technician to inspect track bar bushings and bolts, but the same event can expose play in other suspension joints.
A steering shake should not automatically be blamed on the track bar. Tire and wheel issues, steering linkage wear, and other mechanical faults may produce similar behavior. Inspect the complete system and use the vehicle’s diagnostic procedure before replacing parts.
Use evidence
Connect each symptom to observed play, damage, a loose connection, or a test result rather than relying on a symptom checklist alone.
Step 7: Check Axle Position and Suspension Geometry
If the track bar looks intact but the axle appears shifted to one side, check the vehicle’s ride height and suspension configuration. A solid axle can sit off-center after a suspension lift because the original bar follows an arc as the suspension moves. Adjustable track bars may be used on some vehicles to correct axle position.
Do not adjust the bar simply because the tires appear uneven beneath the fenders. Body panels, factory tolerances, uneven ground, tire sizes, and suspension changes can affect what you see. Park on level ground and use the model-specific procedure to assess axle position.
An adjustable bar should have adequate thread engagement, properly secured jam nuts where fitted, correct end hardware, and clearance throughout the suspension’s travel. The manufacturer’s instructions determine the permitted adjustment range and installation method. If you cannot verify those requirements, have a suspension shop perform the work.
Source: www.motortrend.com
Check ride height
Compare left and right ride height on level ground and consider whether a spring, spacer, or other suspension part has changed.
Check bar alignment
Look for interference, an extreme adjustment position, or a joint operating at an angle outside its intended range.
Check suspension travel
Verify clearance and joint articulation using the approved procedure. Do not place yourself beneath an unsupported or moving axle.
Can a Track Bar Be Good Even if the Axle Is Off-Center?
Yes. An axle may be off-center because of lift height, incorrect adjustment, the wrong replacement part, or an altered mounting bracket even when the bar itself has no worn joints. The reverse is also possible: the axle may appear centered while a bushing or mount is worn.
Separate the question of component condition from the question of axle geometry. First confirm that the bar and its mounting points are sound. Then verify axle position and bar length against the vehicle or suspension kit specifications.
Best approach
Inspect the hardware and joints first, then assess alignment and adjustment as a separate step.
How to Interpret Your Inspection Results
Use the inspection findings to decide whether the track bar needs monitoring, further diagnosis, or repair before the vehicle is driven. The table below summarizes common findings and sensible next steps. It is a general guide, not a substitute for the service limits that apply to a particular vehicle.
A single visual clue may not reveal the full cause. For example, a damaged bushing can coexist with a loose bolt, and a cracked bracket can make a new bushing ineffective. Repair the underlying fault and inspect the associated hardware before returning the vehicle to use.
Source: carpartsfaq.com
Visible crack or broken mount
Stop driving if structural integrity or axle control may be affected. Arrange professional repair and verify related components.
Loose bolt or shifted joint
Determine whether the hardware, threads, bushing, or bracket is damaged. Follow the correct service procedure for repair.
Worn bushing or joint
Replace the failed component or approved assembly, depending on the design and manufacturer requirements.
No visible fault but symptoms remain
Arrange a broader steering and suspension diagnosis rather than replacing the track bar without evidence.
Inspection Decision Table
Use this table to organize the next step after your checks. Any vehicle-specific service limit takes priority over the general guidance shown here.
Condition: Clean bar, secure mounts, no abnormal play
Result: No obvious track bar defect found. If symptoms remain, inspect related steering and suspension parts.
Condition: Torn rubber or excessive joint movement
Result: Confirm the joint’s service limits and replace the worn component or assembly as required.
Condition: Missing bolt, cracked bracket, or elongated hole
Result: Do not drive if the attachment may be unsafe. Repair the mount and hardware correctly before use.
Condition: Axle offset without visible joint damage
Result: Check ride height, bar length, lift geometry, and mounting location before deciding whether adjustment is needed.
Common Track Bar Inspection Mistakes
The most common mistake is replacing the track bar based only on a clunk or loose steering feel. These symptoms have several possible causes. Confirm the source of the movement before spending money on parts.
Another mistake is tightening every fastener without checking the service procedure. A bolt may have the wrong specification, damaged threads, or a mounting hole that no longer holds it correctly. More torque does not fix a cracked bracket or worn joint.
Avoid inspecting the vehicle while it is poorly supported or asking a helper to move the steering while your hands are near a joint. A short inspection is not worth the risk of a vehicle falling or a pinch injury. Stop whenever you cannot maintain a safe position.
Source: storage.googleapis.com
Mistake: Treating all movement as failure
Why it is wrong: Rubber bushings and articulated joints are designed to move within limits. Use the correct test and specifications.
Mistake: Assuming the track bar causes every steering problem
Why it is wrong: Tires, wheel bearings, ball joints, steering links, and alignment can produce overlapping symptoms.
Mistake: Using an invented torque value
Why it is wrong: Torque depends on the exact fastener and application. Obtain the specification for the vehicle or approved suspension kit.
Mistake: Adjusting the bar before checking for wear
Why it is wrong: Changing length does not repair a worn joint, loose bolt, cracked bracket, or damaged thread.
Mistake: Driving to see whether a loose part gets worse
Why it is wrong: A compromised track bar mount can affect axle control. Stop and arrange an inspection if a serious fault is suspected.
When Is Professional Diagnosis Necessary?
Professional help is appropriate when the source of movement is unclear, the mounting structure is damaged, the correct inspection requires loaded suspension testing, or the vehicle has aftermarket suspension parts with unknown specifications. A qualified technician can use the approved procedure to isolate the fault.
Seek immediate help if the vehicle has severe steering looseness, visible axle movement, a loose or missing track bar fastener, or a cracked attachment bracket. Do not drive it to a repair shop if doing so may compromise control.
Ask for a targeted inspection
Describe the noise, handling change, recent repairs, and any visible damage. Ask the technician to inspect both track bar ends and the surrounding steering and suspension parts.
Frequently Asked Questions
Q
How do I know if my track bar is bad?
Common warning signs include a clunk over bumps, unusual steering looseness, visible bushing damage, excessive joint play, loose mounting hardware, and cracks in the bar or brackets. These symptoms are not conclusive on their own. Confirm the fault by inspecting the mounting points and following the vehicle’s approved test procedure.
Q
Can I check a track bar without removing it?
Yes. A visual inspection and an approved movement check can reveal many problems without removing the bar. You can look for damaged bushings, loose hardware, cracks, and unwanted movement at the joints. Some faults require a loaded suspension test, measurements, or removal for closer inspection.
Q
Should a track bar move by hand?
The answer depends on the joint design and whether the suspension is loaded. Rubber bushings may flex, and articulated joints may pivot as intended. Excessive free play, movement inside a mounting hole, a loose housing, or separation from the bushing is more concerning than normal articulation. Follow the manufacturer’s test limits rather than judging by hand feel alone.
Q
Can a bad track bar cause a clunk?
Yes. A worn bushing, loose bolt, damaged joint, or moving bracket can cause a clunk when suspension or steering loads change. However, sway bar links, control arm bushings, steering joints, and other components can make similar noises. Inspect the full area to identify the source.
Q
Can I drive with a loose track bar?
Driving may be unsafe if the track bar or its mounting hardware is loose enough to allow unwanted axle movement. Severe steering looseness, a missing bolt, a cracked bracket, or visible movement at an attachment point calls for stopping and arranging a safe recovery. Do not assume that a slow drive is safe simply because the vehicle still moves.
Q
How often should I inspect a track bar?
Follow the vehicle manufacturer’s maintenance schedule and inspect the bar whenever suspension or steering work is performed, after a significant impact, or when new noises or handling changes appear. Modified vehicles may also need checks specified by the suspension kit manufacturer. There is no single inspection interval that applies to every vehicle.
Q
Does an off-center axle always mean the track bar is bad?
No. Axle offset can result from suspension lift height, incorrect track bar adjustment, altered mounting brackets, or a mismatched replacement part. A worn track bar can also cause problems without making the axle visibly off-center. Check component condition first, then assess geometry and bar length using the correct specifications.
✦ Wrapping Up
Conclusion
Checking a track bar starts with identifying the correct component and inspecting its full length, end joints, mounting bolts, and brackets. Look for cracks, severe corrosion, damaged bushings, loose hardware, and abnormal movement. If a symptom suggests a fault, use the vehicle-specific service procedure to confirm the cause rather than replacing parts based on guesswork.
A safe inspection also means knowing when to stop. Structural damage, loose attachment hardware, visible axle movement, and severe steering problems require prompt attention. If you cannot confirm the condition or carry out the test safely, have a qualified technician inspect the track bar and related suspension parts before the vehicle returns to the road.
💡 Key Takeaway
Park the vehicle safely, inspect both track bar ends and their mounting points, record any damage or abnormal movement, and compare your findings with the service manual. Do not drive if the bar or its mounts may be unsafe.
Eric
Hi, I’m Eric Bennett, the person behind OffRoadTruckAccessories.com.
I created this blog to share my interest in trucks, off-road driving, automotive accessories, and DIY modifications. I enjoy learning how different truck accessories work, testing their usefulness, and understanding whether they are truly worth buying.